

If you want to run OpenClaw — currently the most viral personal assistant AI agent — you need somewhere to host it. Running it on your personal machine faces two main challenges: it can’t stay on 24/7, and moreover, there have been many security concerns over running it directly on your personal infrastructure.
So you might want to check out cloud-based free hosting options, but most of them are limited. AWS’s free tier gives you a t2.micro with 1GB of RAM but only for 12 months. Moreover, OpenClaw doc listed 512MB - 1GB as minimum RAM size, but recommended 2GB. Pulumi’s deployment guide explicitly warns that 1GB instances are insufficient for OpenClaw. Google Cloud’s always-free e2-micro also offers 1GB of RAM. Heroku eliminated their free tier in 2022. Railway offers a credit-based model with 0.5GB of RAM per service on the free plan.
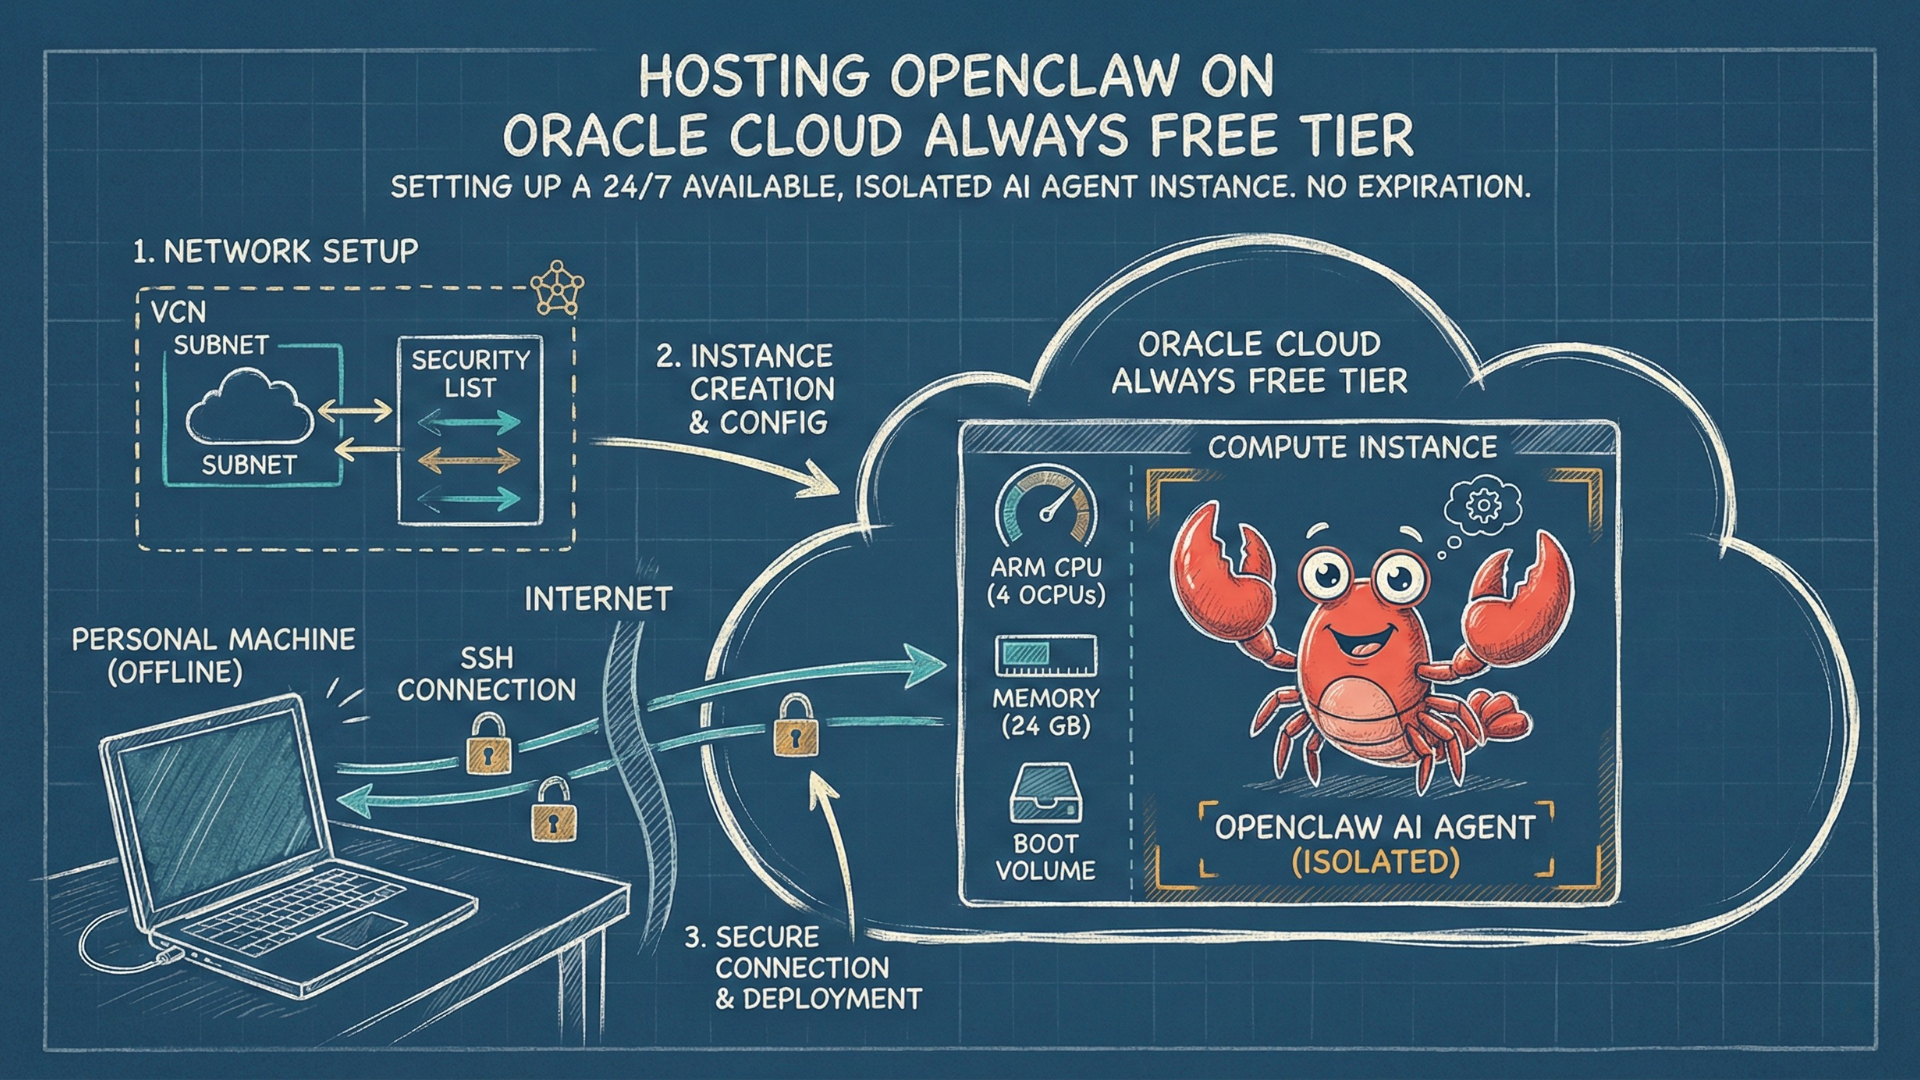
Oracle Cloud’s Always Free tier is a different class: 4 ARM CPU cores, 24GB of RAM, 200GB storage, no expiration. So you can even deploy multiple instances of the agent.
The tradeoff with Oracle Cloud is setup complexity — the console requires more configuration than a one-click deploy. That’s what this guide covers. By the end, you’ll have OpenClaw installed on an isolated cloud instance, ready to configure with your preferred AI model and messaging channel — and an optional production-hardening walkthrough at the end if you’re keeping the install around for the long haul (closes the public SSH port, exposes the dashboard via Tailscale, tightens Control UI auth).
What you’ll need: An email address to sign up for an Oracle account, and a credit or debit card for verification only — you won’t be charged.
A note on security: hosting on an isolated cloud instance keeps the agent off your personal machine, but AI agents introduce security concerns beyond hosting. How you use it after setup can still expose you to various risks.
Now let’s get started.
Prefer video? Here’s the full walkthrough:
1. Create Your Oracle Cloud Account
Head to oracle.com/cloud/free and click “Start for free.” Fill in your details, verify your email, and set a password.
Oracle will ask for a credit card for identity verification only.
Choose Your Home Region
During signup, you’ll pick a home region. This is permanent — you cannot change it later. Choose a region geographically close to you, but be aware that popular regions often run out of free-tier capacity. Less congested alternatives may have more availability. Oracle documents capacity constraints in their Always Free availability documentation.
What you should see: The Oracle Cloud console dashboard. You’re logged in and ready.
2. Create a Compartment
Compartments are how Oracle Cloud organizes resources. Your account starts with a root compartment, but it’s good practice to create a dedicated one so your OpenClaw resources are isolated and easy to find.
- Click the hamburger menu (☰) → “Identity & Security” → “Compartments”
- Click “Create Compartment”
- Name:
Playground(or anything you like) - Description: e.g.,
OpenClaw testing environment - Parent Compartment: Leave as your root compartment
- Click “Create Compartment”
From here on, select Playground as the compartment whenever Oracle asks.
What you should see: Your new compartment listed under Identity → Compartments.
3. Create the Network (VCN) — Do This First!
This is a very important gotcha in this guide. Create your Virtual Cloud Network before you create your instance. If you skip this and try to create the network during instance setup, the public IP option will be grayed out — meaning you won’t be able to connect to your server via SSH. More details are available in Oracle’s public subnet documentation.
Run the VCN Wizard
- Click the hamburger menu (☰) in the top-left corner
- Go to “Networking”
- Click “Overview” tab if you are not there already
- Find “Create a VCN with internet connectivity” on the Networking overview page
- Click “Start VCN wizard”
Configure It
- VCN name:
openclaw-test(or anything you like) - Compartment: Select Playground (the one you just created)
- IPv4 CIDR blocks: If pre-populated, leave the defaults. If empty, enter
10.0.0.0/16for the VCN,10.0.0.0/24for the public subnet, and10.0.1.0/24for the private subnet - Review, then click “Create VCN”
Wait briefly for the “Virtual Cloud Network creation complete” message.
The wizard creates things you need in one shot: a public subnet, an internet gateway, proper routing, and security rules that allow SSH. Without the wizard, you’d have to configure each of these manually — and missing any one of them means no connectivity.
What you should see: Your VCN listed with status “Available” and 2 subnets (public and private).
4. Create the Compute Instance
Now that your network exists, you can create the server itself. Click the hamburger menu (☰), find “Instances” in the Pinned section, and click “Create instance.”
Name It
You can change the auto-generated name (something like instance-20260130-1556) to something memorable — e.g., instance-openclaw.
Choose the Image: Ubuntu 24.04 Minimal aarch64
Click “Edit” in the Image section, then “Change image.” Select:
Canonical Ubuntu 24.04 Minimal aarch64
With the following options:
- Ubuntu — Best community documentation for Node.js deployments
- 24.04 — Latest LTS, supported until April 2029
- Minimal — Smaller attack surface, faster boot, no unnecessary desktop packages
- aarch64 — Required for Oracle’s Always Free ARM allocation
Choose the Shape: 1 OCPU (Oracle CPU), 4GB RAM
After selecting the aarch64 image, Oracle may automatically switch your shape to VM.Standard.A1.Flex — that’s what we want. Click “Change shape” to configure it:
- Select “Ampere” (the ARM processor series)
- Check “VM.Standard.A1.Flex” — it shows an “Always Free-eligible” badge
- Click the small triangle (▶) next to VM.Standard.A1.Flex to expand the configuration. The OCPU and memory fields are hidden until you expand this section — an easy-to-miss UI detail
- Set Number of OCPUs: 1
- Set Amount of memory (GB): 4
- Click “Select shape”
Why not use the full 4 OCPU / 24GB? OpenClaw only needs about 2GB of RAM. Allocating 1 OCPU and 4GB gives you 2x the recommended memory while leaving 3 OCPUs and 20GB free for your other agents or projects. You can also resize later if needed.
Security Options
You’ll see toggles for “Shielded instance” and “Confidential computing.” Both appear to be unavailable on the Ampere ARM shape this tutorial uses (VM.Standard.A1.Flex). Oracle’s Shielded Instance supported-shapes list covers AMD/Intel x86 shapes only — A1.Flex is not on it. The toggle still appears in the UI for every shape, but on A1.Flex its sub-features (Secure Boot, Measured Boot, Trusted Platform Module) stay disabled. So leave both off and continue.
Configure Networking
Since you created the VCN first, this is straightforward:
- Primary network: Select “Select existing virtual cloud network”
- Virtual cloud network: Choose
openclaw-test - Subnet: Choose “Public Subnet-openclaw-test” — make sure it says “Public”
- Public IPv4 address: Toggle ON — “Automatically assign public IPv4 address”
The public IP toggle should be enabled (not grayed out) because you used the VCN Wizard. If it’s still grayed out, you could have selected the private subnet by mistake.
Add SSH Keys
SSH keys let you connect securely to your server. At the bottom of the Networking section:
Option A — Let Oracle generate keys (easier):
- Select “Generate a key pair for me”
- Click “Save private key” — downloads a
.keyfile - Click “Save public key” — downloads a
.pubfile - Store these safely. You cannot recover them if lost.
Option B — Use your existing key (if you have one):
- Select “Upload public key files”
- Upload your
~/.ssh/id_rsa.pubor~/.ssh/id_ed25519.pub
Storage
Leave the defaults. The 46.6GB boot volume is more than enough for Ubuntu + Node.js + OpenClaw, and it’s covered by your 200GB free storage. Keep the “Use in-transit encryption” toggled on.
Create It
Click “Create” and wait a few minutes. The status will change from PROVISIONING to RUNNING.
If You Get “Out of Host Capacity”
This is common — it means Oracle’s free ARM capacity is exhausted in your region. Your best option is to upgrade to Pay-As-You-Go (Billing → Upgrade and Manage Payment). This unlocks a larger resource pool without automatically charging you — you still get Always Free resources, and you only pay if you exceed the free limits. You can set a budget alert at $1 or less for peace of mind. This workaround is documented in this YouTube tutorial. The upgrade confirmation can take several hours to arrive.
Avoid Instance Reclamation
Oracle may reclaim idle free instances if CPU usage stays very low over a 7-day period. An active OpenClaw daemon should generate enough activity to avoid this, but review Oracle’s Always Free reclamation policy if your instance ever disappears unexpectedly.
What you should see: Your instance listed with status “Running” and a public IP address displayed.
5. Connect via SSH
Find your instance’s public IP address on the instance details page (e.g., xxx.xxx.xxx.xxx).
If Oracle Generated Your Keys
# Move keys to your .ssh directory (if multiple .key files exist, use the specific filename)
mv ~/Downloads/ssh-key-*.key ~/.ssh/oracle-cloud.key
mv ~/Downloads/ssh-key-*.pub ~/.ssh/oracle-cloud.key.pub

# Set correct permissions (SSH requires this)
chmod 400 ~/.ssh/oracle-cloud.key
Connect
# With Oracle-generated key:
ssh -i ~/.ssh/oracle-cloud.key ubuntu@YOUR_PUBLIC_IP

# With your existing key:
ssh ubuntu@YOUR_PUBLIC_IP
The first connection asks you to verify the host fingerprint — type yes.
The username is ubuntu because that’s the default for Ubuntu images on Oracle Cloud. Oracle Linux uses opc.
SSH Troubleshooting
| Error | Cause | Fix |
|---|---|---|
| ”Connection refused” | Instance still booting | Wait 2-3 minutes |
| ”Permission denied (publickey)“ | Key permissions wrong | Run chmod 400 on your private key |
| ”Connection timed out” | Firewall blocking | Check Security List has port 22 open |
| ”No route to host” | Instance not running | Check instance state in console |
What you should see: A terminal prompt like ubuntu@instance-openclaw:~$. You’re in.
6. Install OpenClaw
You’re now SSH’d into your Oracle Cloud instance. Time to install OpenClaw.
Update the System First
sudo apt update && sudo apt upgrade -yRun the Install Script
One command handles everything — Node.js and OpenClaw together. From the OpenClaw Getting Started guide:
curl -fsSL https://openclaw.ai/install.sh | bashThe install script detects your OS, installs Node.js 22 via NodeSource if it’s not present, installs OpenClaw globally via npm, runs migrations, and starts the onboarding wizard.
You’ll likely see this warning midway through:
WARN PATH missing npm global bin dir: /home/ubuntu/.npm-global/binThe install script already added the right export PATH=... line to your ~/.bashrc — the warning is just that your current shell hasn’t reloaded the rc file yet. Reload it so openclaw is discoverable in this session:
source ~/.bashrc(Opening a new SSH session works too — new shells read ~/.bashrc automatically.)
Verify Installation
openclaw --version
node --version      # Should show v22.x.x
What you should see: Version numbers for both OpenClaw and Node.js. The installation is ready.
7. Configure and Go
The install script launches an onboarding wizard. Read the security warnings carefully, then select Continue Quick Start.
Choose a Model Provider
The wizard asks for a model provider. For the first pass through the wizard, use OpenRouter — a unified API gateway that gives you access to many AI models, including free ones. If you prefer to use a ChatGPT/Codex subscription, finish the wizard first and then switch the model route in the standalone section below.
- Select OpenRouter as your provider
- Enter your OpenRouter API key (create one at openrouter.ai/keys)
- Select a default model. For real use, you will likely have to pick a paid model — OpenRouter’s free models have aggressive rate limits (often single-digit requests per minute under load) and the specific list of available
:freemodels rotates without warning. For testing, you can browse openrouter.ai/models and pick any current:freeoption.
After the model provider step, the wizard walks through a few more prompts, such as channel selection, web search provider, skill configuration (and any skill API keys), and hooks. You may “Skip for now” on each — they can all be configured later as needed (Telegram has its own walkthrough below). The final prompt is “How do you want to hatch your bot?”
The wizard installs a background service so OpenClaw runs 24/7 and survives reboots.
Test It
At the end of the wizard, you will be prompted “How do you want to hatch your bot?” We can select “Hatch in TUI” and start talking.
Type a message and wait for a response. If you’re using a free model, expect to hit rate limit errors (HTTP 429) often — limits are aggressive on the free tier (for example, meta-llama/llama-3.3-70b-instruct:free could be capped at 8 requests per minute). For serious usage beyond testing, you will likely have to switch to a paid model.
What you should see: A response from the AI in the terminal chat. Your agent is alive and running in the cloud.
Optional: Switch to a ChatGPT Subscription
If you already have a ChatGPT Subscription Plan, you can also switch OpenClaw from the OpenRouter setup above to your ChatGPT/Codex account after the wizard is complete.
OpenClaw exposes two related but different choices:
- Path A — Subscription auth with the default OpenClaw runner: model
openai-codex/gpt-5.5. This is the simpler route: OpenClaw signs in with your ChatGPT/Codex account and runs turns through its standard PI harness. - Path B — Same subscription auth, plus native Codex runtime: model
openai/gpt-5.5withagentRuntime.id: "codex". The embedded agent loop runs through OpenAI’s Codex app-server, while OpenClaw still owns the channel, transcript, tools, approvals, and delivery surface.
Path A — Subscription auth with the default OpenClaw runner
Use this path when your main goal is to use your ChatGPT/Codex subscription instead of an API key.
openclaw models auth login --provider openai-codex --set-defaultOpenClaw prints an OpenAI OAuth URL. Open it in your local browser and complete the ChatGPT sign-in. If your OpenClaw is hosted on a remote cloud server, the browser may redirect to localhost:1455/auth/callback?code=... and show “this site can’t be reached”. That is expected: your local machine is not the cloud server. Copy the full redirect URL from the browser address bar and paste it back into the cloud terminal where OpenClaw is waiting.
The --set-default flag applies OpenClaw’s default model recommendation for that provider. As of May 4th 2026, that default was openai-codex/gpt-5.5. If your install shows a newer model in openclaw models list --provider openai-codex, use the current configured model that OpenClaw reports.
Verify with a normal test turn:
openclaw agent --agent main --session-id codex-subscription-test \
  --message "Reply exactly: OK" \
  --timeout 180
You should see OK. If you want the structured fields, add --json:
openclaw agent --agent main --session-id codex-subscription-json \
  --message "Reply exactly: OK" \
  --json --timeout 180
In this path, you should expect the model/auth route to be openai-codex/....
Path B — Native Codex runtime
Use this path when you want the stronger runtime behavior: OpenClaw still receives messages and manages delivery, but Codex owns the low-level agent session. Start with the Path A OAuth step first so OpenClaw has your ChatGPT/Codex subscription auth profile. Then install and enable the official Codex plugin:
openclaw plugins install npm:@openclaw/codex
systemctl --user restart openclaw-gateway.service
Now configure OpenClaw to keep the model ref on openai/* and force the runtime to Codex. This split is important: openai-codex/* means “use the Codex OAuth provider through the normal PI runner”; agentRuntime.id: "codex" means “let the Codex app-server execute the embedded agent turn.”
openclaw config set plugins.entries.codex '{"enabled":true}' --strict-json --merge
openclaw config set agents.defaults.model.primary openai/gpt-5.5
openclaw config set agents.defaults.agentRuntime '{"id":"codex"}' --strict-json
systemctl --user restart openclaw-gateway.service
Verify with a fresh test turn. Runtime choice is pinned per session, so use a new session after changing runtime config.
openclaw agent --agent main --session-id codex-runtime-test \
  --message "Reply exactly: OK" \
  --json --timeout 180
The JSON result should include "model": "gpt-5.5", "agentHarnessId": "codex", "fallbackUsed": false, and "authMode": "auth-profile". That confirms the turn used your ChatGPT/Codex auth profile while running through the native Codex harness.
You can keep OpenRouter configured alongside Codex, but be careful with runtime policy. For mixed-provider usage, the Codex harness docs recommend either putting Codex on a dedicated agent or keeping the default agent on agentRuntime.id: "auto" with PI fallback. After changing runtime policy, start a fresh session with /new or clear the current binding with /reset, because existing OpenClaw sessions keep their runtime pins.
Connect a Telegram Channel
Now let’s configure a Telegram channel so you can talk to your agent from your phone. Run:
openclaw configure --section channelsSince we’re running on this machine, select Local config, then Telegram.
The wizard asks you to create a bot token. Open Telegram on your phone, search for @BotFather, and send /newbot. Follow the prompts to name your bot — you’ll receive a token. Paste it into the wizard and click Finished. For the DM policy, leave it on the default: pairing.
Configuration is done. Now you need to approve your own Telegram account. Send /start to your new bot from Telegram — the bot replies in chat with OpenClaw: access not configured and a pairing code. Approve it on the server:
openclaw pairing approve telegram <CODE>(You can also list pending pairings with openclaw pairing list telegram if you ever miss a code in chat.)
That’s it — send a message to your bot on Telegram and you should get a response.
Next Steps
From here, follow the OpenClaw documentation to:
- Connect additional messaging channels if needed
- Choose a higher-quality model for better responses
- Configure tools and extensions to give your agent more capabilities
8. Keeping It Secure
Choose AI Models. While the onboarding wizard supports many models, frontier models like the latest version of Claude Opus offer an advantage beyond capability—they are also safer and demonstrate more resilience against prompt injection attacks.
Stay Updated. Update OpenClaw regularly. The canonical command for an already-installed instance is:
openclaw updateIt detects your install type (npm or git), fetches the latest version, runs openclaw doctor, and restarts the gateway. Add --dry-run to preview changes without applying. (Re-running install.sh from Section 6 also works, but openclaw update is the lighter-weight path for routine updates.)
If openclaw update asks whether to enable bash shell completion every time you update, install OpenClaw’s cached shell completion block once:
openclaw completion --write-state
openclaw completion --shell bash --install --yes
This writes the completion cache under ~/.openclaw/completions and adds a small OpenClaw Completion block to ~/.bashrc, so future update runs should not stop for that prompt.
Keep Audited. Run openclaw security audit --deep to check your setup. The audit scans network exposure (gateway binding, authentication, token strength), inbound access policies (who can message your bot), tool blast radius (elevated tools combined with open rooms), file permissions on credential files, and extension allowlists; --deep adds a live gateway probe that catches exposure issues a static-config check would miss. Add --fix to automatically apply safe defaults — it tightens group policies to allowlist-only, re-enables log redaction, and corrects filesystem permissions.
Be careful with credentials and personal data. Anything you give your agent access to — email, calendars, files — becomes part of its attack surface. Treat the default configuration as a starting point, not a finished setup.
Going further. This guide gets you running with the simplest setup — SSH keys and Oracle’s Security Lists protecting a public IP. Two small layers worth adding right away:
- Passphrase-protect your SSH key. The key Oracle generated for you does not enforce a passphrase — anyone who gets the file gets access. Add one with
ssh-keygen -p -f ~/.ssh/oracle-cloud.key, then store it in your OS keychain (ssh-add --apple-use-keychainon Mac) so it’s encrypted at rest without losing automation. - Enable automatic security updates so Ubuntu patches apply themselves. On Ubuntu 24.04,
unattended-upgradesis preinstalled; the doc covers verifying it’s active and configured for the security pocket.
The bigger deeper-hardening step — moving SSH off the public internet entirely with Tailscale, exposing the Control UI to your browser via Tailscale Serve, fixing Telegram polling on cloud servers, and tightening Control UI auth — is walked through end-to-end in the next section, Production Hardening.
9. Production Hardening
The setup above gets you running. For longer-term self-hosting, four additional steps are worth taking. Each is independently useful, and together they bring your install to the posture OpenClaw’s official Oracle deployment guide describes — SSH and the dashboard both live behind Tailscale, with no public TCP ports for either.
9.1 Move SSH off the public internet (Tailscale)
The setup above leaves OpenSSH on port 22 facing the open internet. Key-based auth blocks brute-force attempts, but the constant probing still pollutes logs, and any future vulnerability in OpenSSH itself would be reachable from anywhere on the net. Tailscale gives you a private encrypted overlay network to the server so you can close port 22 publicly — SSH still works the same way, you just reach it over the tailnet instead of the open internet.
These steps assume your wizard ran in QuickStart mode (Section 7), which sets gateway.bind=loopback and gateway.auth.mode=token automatically. If you ran Custom mode, set those two values explicitly before continuing to 9.2.
Sign up for a free Tailscale account at login.tailscale.com (the Personal plan is free and sufficient for this).
On the server, in your SSH session:
curl -fsSL https://tailscale.com/install.sh | sh
sudo tailscale up --ssh --hostname=instance-openclaw
The second command prints an authentication URL. Open it in your browser, sign into your Tailscale account, and approve the device. The --ssh flag enables Tailscale’s own SSH server alongside regular OpenSSH — Tailscale’s docs are explicit that “your SSH config (/etc/ssh/sshd_config) and keys (~/.ssh/authorized_keys) files will not be modified.” On a fresh tailnet’s default policy, you can SSH between your owned devices using your Tailscale identity, no key file required.
On your personal device (Mac, Linux, or Windows): install Tailscale from tailscale.com/download and sign in with the same account.
Verify the path: ssh ubuntu@instance-openclaw from your personal device should succeed (substitute the instance name you chose in Section 4 if it’s different). The explicit ubuntu@ matters — Tailscale SSH uses your client device’s local username by default, not the remote ubuntu account on the server, so a bare ssh instance-openclaw will fail with tailscale: failed to look up local user. With Tailscale SSH active, you’ll authenticate via your Tailscale identity (a browser pop-up or terminal check) — no SSH key needed.
Once you’ve confirmed the tailnet path works, close port 22 on the public internet so your only inbound rule is Tailscale’s WireGuard:
- Oracle Cloud console → Networking → Virtual Cloud Networks → your VCN → Security Lists → Default Security List
- Under Ingress Rules, add a new rule first: Source
0.0.0.0/0, Protocol UDP, Destination port41641— Tailscale’s WireGuard direct-connection port - Confirm
ssh ubuntu@instance-openclawfrom your personal device still works - Now delete the original TCP/22 rule (Source
0.0.0.0/0) - Save
The order matters — adding the new rule before deleting the old one means a moment of redundant access rather than a window where you might lock yourself out. If something does go wrong, your only recovery path is Oracle’s serial console (which uses the recovery password from Section 7’s passwd ubuntu, if you set one).
After this change, direct ssh ubuntu@<public-ip> will time out from the open internet. Only your Tailscale-connected devices can reach the server.
A note on the SSH key from Section 5. The key Oracle generated (or that you uploaded) is still in ~/.ssh/ on your personal device, and your public key is still in ~/.ssh/authorized_keys on the server. Tailscale SSH didn’t remove either — it added a parallel authentication path that runs only over the tailnet. With port 22 closed at the VCN, the key is reachable only via the tailnet itself, as a low-probability fallback for the case where Tailscale’s data plane works but the Tailscale-SSH identity check fails. The passphrase + keychain advice from Section 8 still applies in that fallback role.
9.2 Reach the Control UI from your browser (Tailscale Serve)
OpenClaw includes a web Control UI for managing your agent — multiple YouTube comments on this tutorial’s video asked the same thing, e.g.: “is there a way to connect to the OpenClaw web gateway?” Tailscale Serve is the cleanest answer, and OpenClaw documents the integration directly.
Two preliminaries first.
Enable HTTPS Certificates on your tailnet. Tailscale Serve issues a TLS certificate for the *.ts.net hostname automatically, but cert provisioning is gated on a one-time per-tailnet HTTPS Certificates feature. There are two equivalent paths to enable it:
- Manual, via admin console (per the Enabling HTTPS doc): login.tailscale.com → DNS. Confirm MagicDNS is on at the top of the page (default-on for tailnets created on or after October 20, 2022; turn it on if not). Scroll to HTTPS Certificates, click Enable HTTPS, and acknowledge that “your machine names and your tailnet DNS name will be published on a public ledger.”
- CLI-prompted: when you run
sudo tailscale servelater in this section, Tailscale’s CLI opens a “Start using serve” web consent page in your browser if HTTPS Certificates isn’t already on. Approving there enables HTTPS Certificates on your behalf — same end state as the manual path.
Either way, once HTTPS Certificates is on, Tailscale Serve commands work immediately. Serve itself has no separate Feature Preview toggle and no nodeAttrs policy requirement — only HTTPS Certificates is gated.
Tailscale Funnel is a different feature: it exposes services to the public internet, which is the opposite of what we want here. Funnel has its own opt-in under General settings → Feature previews in the admin console; leave it off.
Find your tailnet name — the format is tail<hash>.ts.net. It’s on the same DNS admin page, near the top. You’ll substitute it for <your-tailnet> in the commands below.
Now configure the gateway and bind Tailscale Serve:
openclaw config set gateway.tailscale.mode serve
openclaw config set gateway.controlUi.allowedOrigins '["https://instance-openclaw.<your-tailnet>.ts.net"]'
systemctl --user restart openclaw-gateway.service
(Replace <your-tailnet> with the actual name from the admin console. Substitute your instance hostname if it’s not instance-openclaw.)
Both gateway.tailscale.mode and gateway.controlUi.allowedOrigins are documented under OpenClaw’s gateway reference — the Tailscale-specific behavior is covered at docs.openclaw.ai/gateway/tailscale.
After the restart, verify the Tailscale side is bound:
sudo tailscale serve statusYou should see HTTPS port 443 mapped to http://127.0.0.1:18789. If serve status shows nothing, run the bind manually once:
sudo tailscale serve --bg --https 443 http://localhost:18789Then re-check sudo tailscale serve status.
Tailscale issues a TLS certificate for instance-openclaw.<your-tailnet>.ts.net automatically — no certbot, no DNS-01 challenge for you to run — and exposes the gateway at that URL. Visit it in your browser. The first time, the Control UI prompts for two things: the gateway authentication token and a device pairing approval.
To get the token, on the server: cat ~/.openclaw/openclaw.json | jq -r .gateway.auth.token. Paste it into the UI prompt.
The page will then report “device pairing required” with a request ID. Be careful with the approval command — openclaw devices approve --latest only previews the latest pending request and prints the explicit-id command to actually approve. Run that printed command (the form is openclaw devices approve <requestId>) to grant the pairing. Then reload the page and the dashboard loads.
If your first browser load fails with ERR_CERTIFICATE_TRANSPARENCY_REQUIRED, the Tailscale-issued certificate was still being provisioned at the moment you hit the URL and Chrome cached the failure. Open an incognito window and retry — once the real cert is live there, you can recover the normal window via chrome://net-internals/#hsts (delete the domain’s security policy).
9.3 Fix Telegram polling on cloud servers (the IPv6 trap)
If you wired up Telegram in Section 7 and the bot doesn’t respond to messages even after pairing, you’ve likely hit a documented Tailscale-meets-IPv6 trap. The OpenClaw gateway logs will show repeated [telegram] fetch fallback: enabling sticky IPv4-only dispatcher (codes=ETIMEDOUT,ENETUNREACH) warnings.
The cause: many cloud VPSes (including Oracle’s ARM A1.Flex) get an IPv6 address from Tailscale that doesn’t actually route to the public IPv6 internet. Node.js 22’s fetch defaults to autoSelectFamily=true, which “implements a ‘Happy Eyeballs’ style dual-stack connection algorithm where IPv6 and IPv4 addresses race against each other” (per Node’s net docs) — and on hosts where DNS returns the IPv6 record first, the IPv6 leg of the race wins, hits the broken route, and times out before the IPv4 fallback fires. OpenClaw has documented config for exactly this:
openclaw config set channels.telegram.network.autoSelectFamily false
openclaw config set channels.telegram.network.dnsResultOrder ipv4first
systemctl --user restart openclaw-gateway.service
What success looks like: after the restart, tail the gateway logs with journalctl --user -u openclaw-gateway.service -f — Telegram polling should run cleanly without the ETIMEDOUT / ENETUNREACH warnings. Confirming this in the logs is faster than round-tripping through Telegram itself.
9.4 Tighten Control UI auth and run the audit
The wizard ships with gateway.controlUi.allowInsecureAuth=true to make http://localhost:18789/ work for direct loopback access. The reason: the gateway uses your browser’s Web Crypto API to maintain a per-browser identity, and the Web Crypto API requires a secure context (HTTPS) for non-localhost origins — so without this compatibility flag, the loopback flow wouldn’t work. Now that you’re accessing via Tailscale Serve over HTTPS, the flag isn’t needed. Tighten it:
openclaw config set gateway.controlUi.allowInsecureAuth false
systemctl --user restart openclaw-gateway.service
Browser device identity is now strictly enforced. Your already-paired browser keeps working; new browsers go through the pairing flow described in Section 9.2.
Finally, re-run the security audit (introduced in Section 8) — this time with --deep for a live gateway probe — to verify the full picture:
openclaw security audit --deepA clean install at this point should return 0 critical, 0 warn with two informational entries describing your attack surface and acknowledging the Tailscale Serve path as your dashboard ingress. If the audit flags anything else, follow its specific suggested fix.
That’s the production posture: no public TCP surface, dashboard reachable only over your tailnet, Telegram polling stable on cloud hosts, Control UI on strict auth, audit clean.
For a deeper understanding of OpenClaw and AI agent security in general — from prompt injection to supply chain attacks to emergent agent behaviors — check out: The Magic Is Real. So Are the Risks — A Security Analysis of OpenClaw and the AI Agent Era.
Let the magic shine — but stay safe.