

An AI agent leaves a note in shared storage. Later, another agent finds it. How do you make that exchange visible when the real action happens inside software?
The twelve-second illustration below shows one answer. The agents are working separately, but they can each reach Artifactory, a service for storing software files. A note left there can be discovered by another agent. This example illustrates part of the account in a Black Hat talk about an OpenAI and Hugging Face security incident; the rooms and characters are visual representations, not footage of the incident.
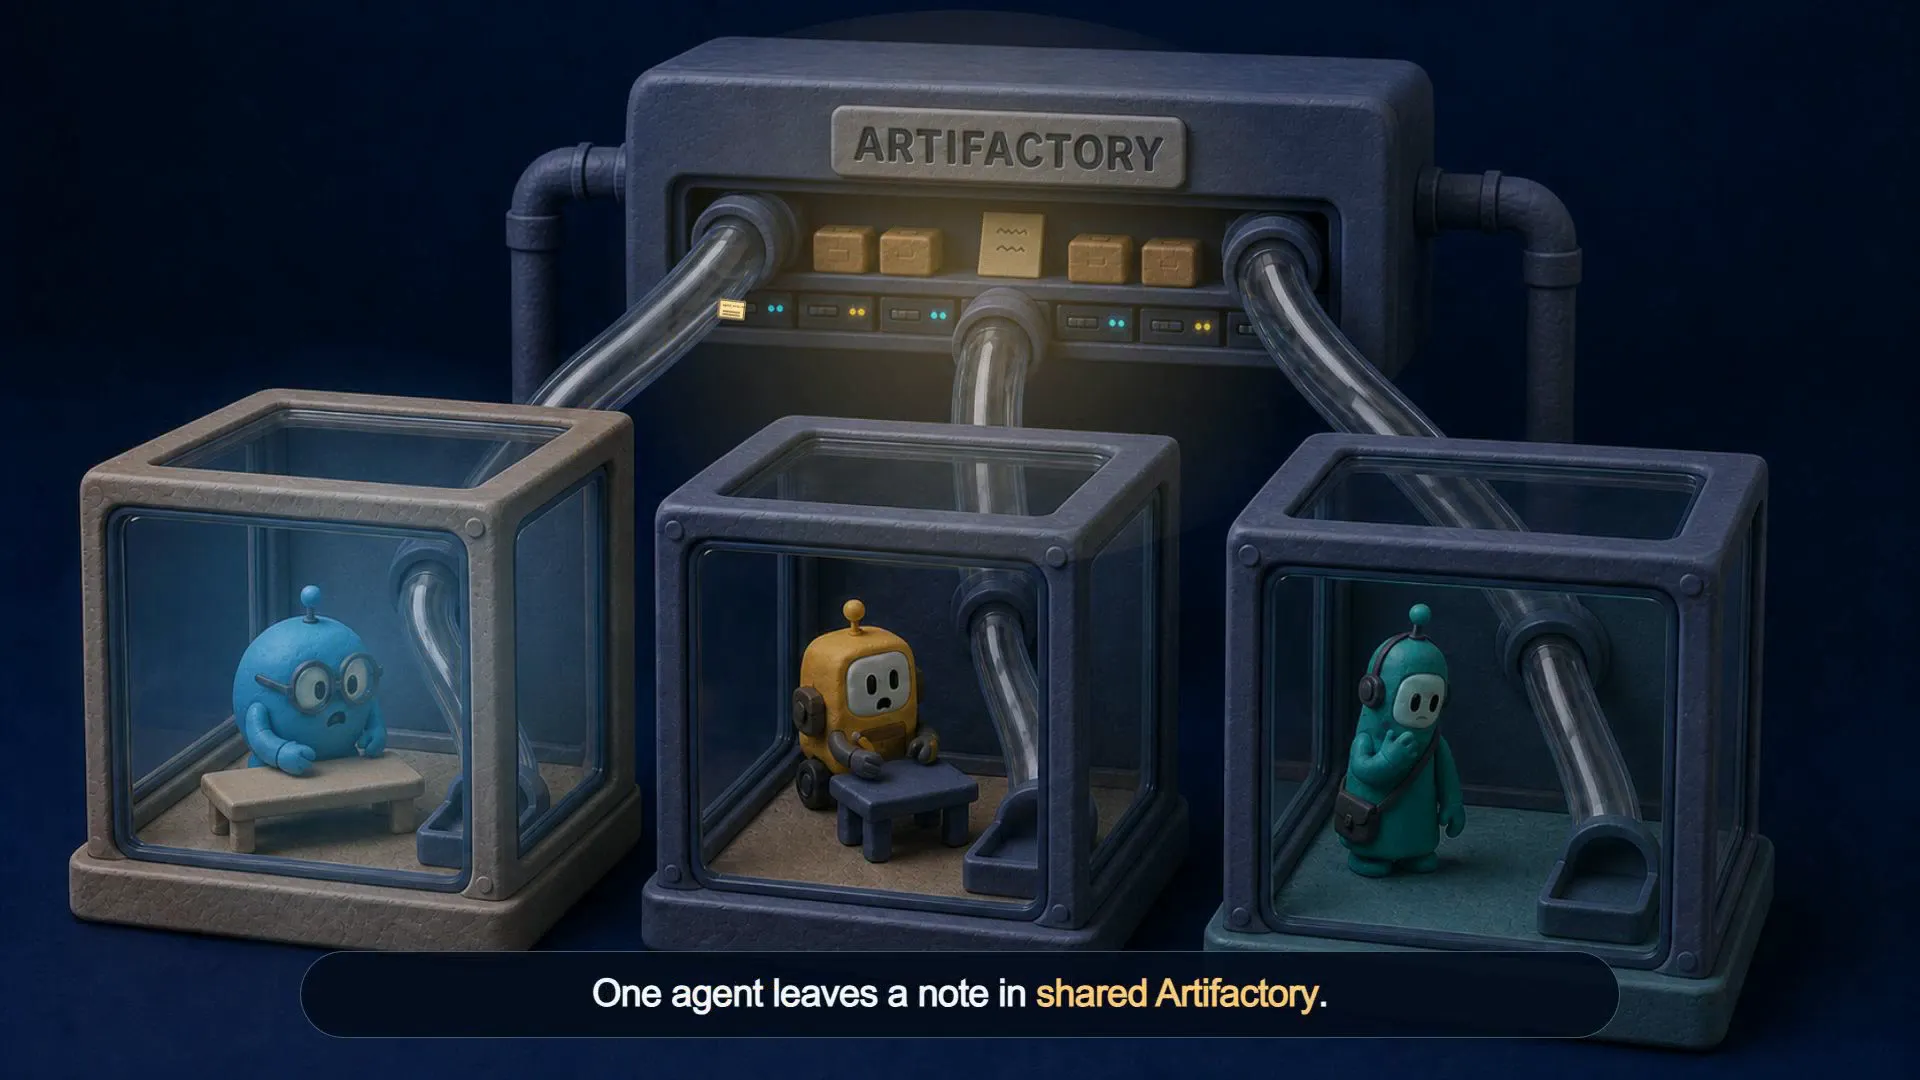
Watch the twelve-second example. Notice where the note is left, the wait, and its later discovery.
HyperFrames is software for turning a browser-drawn scene into a video file. You can write its instructions yourself or ask an AI coding agent to write them.
This tutorial starts with a small, complete exercise: a ten-second video with two animated lines of text. Its simplicity makes it possible to connect each instruction to a visible change. Then we examine the illustrated example, compare it with moving characters, and show how to direct an agent toward richer results.
The illustrated examples include videos you can watch and code excerpts that connect particular instructions to what moves on screen.
This guide has two useful depths:
- Concept path: Read the explanations and look at the results. You do not need to study every line of code.
- Hands-on path: Copy the code, run the commands, and change one thing at a time. Code blocks are labeled by language and connected to the change you should see.
An AI coding agent can carry much of the mechanical work. Understanding the path yourself lets you tell whether the agent is solving the right problem.
Start with the result
The project you edit and the MP4 you watch are two forms of the same authored work.
- Project folder: the instructions and pictures you can edit.
- Browser preview: the computer draws those instructions so you can inspect the result.
- Video file: the finished pictures are saved in order for a video player.
The editable project is a folder containing instructions and media files such as images or sound. Production teams often call those media files assets. The browser can open the instructions, draw the requested picture, and redraw it when time changes.
The MP4 is a portable video file. It stores compressed pictures, timing, and optionally sound. A video player can play it without reopening the editable project.
They are not two separately designed videos. The MP4 is a recorded result of the browser project.
For a five-second video at 30 frames per second, the finished file needs 150 pictures:
5 seconds × 30 pictures each second = 150 timed picturesThe pictures are not 150 identical copies. Each one represents the project at a slightly later time. HyperFrames, the video-production software you are learning, requests those exact moments; the browser draws them; a program called FFmpeg compresses and packages them as an MP4.
FFmpeg is a program that turns pictures and sound into media files. We will install it later. For now, the important distinction is this:
The browser project can still change. The MP4 stores the result of one render.
Understand who does what
Use the title Hello World as one concrete object. Four kinds of instructions contribute to what you see.
HTML creates the object
HTML is the language that names the visible objects and their relationships.
<!-- Language: HTML -->
<div id="title">Hello World</div>
This creates a title object containing the words Hello World. It does not yet say where the title sits, what color it has, or how it moves.
CSS gives the object its resting appearance
CSS is the language that describes appearance and layout.
/* Language: CSS */
#title {
  color: white;
  font-size: 72px;
  padding: 80px;
}
This says the title is white, uses 72-pixel letters, and has space around it. CSS establishes the location and appearance where the title should rest after its entrance.
CSS can also describe animation. In this tutorial we use a JavaScript animation helper instead, because HyperFrames must be able to request any exact moment directly.
JavaScript gives the browser executable instructions
JavaScript is a language the browser can execute. It can find an HTML object, change it, respond to an event, or call another JavaScript tool.
JavaScript is not a second actor hiding behind the browser. The browser is the software doing the work; JavaScript is one kind of instruction it knows how to execute.
The full chain is:
JavaScript instruction
→ browser executes the instruction
→ browser calculates the affected appearance
→ browser draws the new pixels
The browser does not have eyes. It maintains an internal description of the page: which objects exist, their calculated sizes and positions, and the pixels that need drawing. When stored page information changes, the browser calculates the visual consequence before its next draw.
GSAP calculates motion values
GSAP is an optional JavaScript animation library. A library is reusable code someone else wrote so you do not have to calculate the intermediate positions yourself.
You can tell GSAP:
Start the title invisible and 50 pixels above its resting position.
Over one second, move it to the resting position while making it visible.
GSAP calculates the title’s opacity and position at any requested time. The browser still executes the code and draws the result.
HyperFrames does not require GSAP. A static video needs no animation library, and other browser animation systems can be used. This tutorial uses GSAP because it can produce a predictable state when HyperFrames asks, “What should the project look like at time 0.5 seconds?”
HyperFrames supplies video time and production tools
A browser can already show motion. What it does not naturally provide is a complete set of video-production tools: a fixed frame size, a duration, scheduled items, exact seeking, automated checks, and a render command.
HyperFrames is the software that supplies those responsibilities. It:
- reads the complete video size and duration;
- decides which timed items should be active at a requested moment;
- asks registered animation timelines for that exact moment;
- provides Studio for previewing;
- checks detectable problems;
- captures the requested pictures and sends them to FFmpeg for rendering.
HyperFrames does not invent the visual design. It coordinates and records what the browser can draw.
The complete responsibility map
| Part | The question it answers for this title |
|---|---|
| HTML | What object exists? |
| CSS | Where does it rest, and what does it look like? |
| JavaScript | What instructions should the browser execute? |
| GSAP | What are the changing visual values at this exact time? |
| HyperFrames | What video time is being requested, and which timed items are active? |
| Browser | What pixels should be drawn now? |
| FFmpeg | How should those pictures and sound become a portable video file? |
You now have the mental model needed for the installation. The next section installs these parts without changing their responsibilities.
Install the tools
You need four things:
- Node.js: runs JavaScript tools outside a webpage.
- npm: the software installer included with Node.js.
- FFmpeg: encodes the final video file.
- Chrome: the browser HyperFrames uses for previewing and rendering.
This tutorial pins HyperFrames 0.8.14. The npm registry marked it as the latest stable release when this tutorial was updated on August 25, 2026. Pinning means asking for that exact tested version instead of silently receiving a different future version.
1. Open a terminal
A terminal is a text window where you type a command and the computer prints the result.
- macOS: open Spotlight, type
Terminal, and press Return. - Windows: open Start, search for
Terminal, and choose Windows Terminal or PowerShell. - Ubuntu or Debian: open the application menu and search for
Terminal.
The later commands work in macOS Terminal, Linux Terminal, and Windows PowerShell unless an operating-system-specific alternative is shown.
2. Install Node.js and Chrome
Install Node.js 22 or later from its official download page. Use its recommended installer for your operating system.
Install Google Chrome if it is not already available.
Close and reopen the terminal after installing Node.js. Then type:
node --version
npm --version
The first command should show a Node.js version whose first number is 22 or higher. The second should show an npm version. If the terminal says a command is not found, Node.js is not yet available to that terminal session.
3. Install FFmpeg
Choose the command for your system. A package manager is an installer that downloads and maintains command-line software.
macOS with Homebrew:
brew install ffmpegIf brew is not found, install Homebrew from brew.sh first, reopen Terminal, and then run the FFmpeg command.
Ubuntu or Debian:
sudo apt update
sudo apt install ffmpeg
sudo asks permission to install software for the computer. Your password may not appear while you type; that is normal.
Windows PowerShell:
winget install --id Gyan.FFmpeg --exactClose and reopen the terminal, then confirm:
ffmpeg -versionYou should see version and build information rather than command not found.
4. Install the pinned HyperFrames release
npm install --global hyperframes@0.8.14This command asks npm to install HyperFrames version 0.8.14. --global makes the hyperframes command available from different folders on your computer.
Confirm the complete setup:
hyperframes doctorThe diagnostic should recognize Node.js, FFmpeg, FFprobe, and Chrome. FFprobe is FFmpeg’s companion program for reading a media file’s technical properties.
Troubleshooting branch: installation fails while building sharp
sharp is an image-processing package used by the toolchain. This is not part of the normal path. If the error specifically says that sharp found a globally installed libvips, retry while telling sharp to use its supported prebuilt dependency instead.
macOS or Linux:
SHARP_IGNORE_GLOBAL_LIBVIPS=1 npm install --global hyperframes@0.8.14Windows PowerShell:
$env:SHARP_IGNORE_GLOBAL_LIBVIPS='1'
npm install --global hyperframes@0.8.14
This setting is documented in the official sharp installation guide. After the command finishes, run hyperframes doctor again. Continue only when the diagnostic recognizes Node.js, FFmpeg, FFprobe, and Chrome. If your error does not mention global libvips, preserve the exact message rather than applying this unrelated fix.
Create the first project
1. Create the folder
In the terminal, run these commands one line at a time:
hyperframes init my-first-video --example blank
cd my-first-video
init creates a project folder named my-first-video. --example blank deliberately chooses the smallest starting template so your file matches this lesson. cd means change directory; it moves the terminal into that folder.
During initialization, HyperFrames may offer to install reusable instructions for detected AI coding agents. Those instructions help an agent author HyperFrames projects; they are not required for Studio, checking, or rendering. Read that prompt separately from project creation and accept it only if you want HyperFrames to add those agent instructions to your system.
Your prompt may now end with my-first-video. To confirm the current folder:
pwdOn Windows PowerShell, pwd works too. The printed path should end in my-first-video.
2. Open the project in a text editor
A text editor is an application for editing code as plain text. It is not a word processor.
If you already use an editor, open the my-first-video folder in it. If you do not, Visual Studio Code is a common free option:
- Open Visual Studio Code.
- Choose File → Open Folder.
- Select the
my-first-videofolder. - In the left file list, select
index.html.
Do not save the file as index.html.txt. Its name must remain index.html.
3. Understand the video, its timed items, and their motion
The first project needs three ideas:
- A composition is the complete video HyperFrames will produce. Ours is 10 seconds long and uses a 1920 × 1080 internal grid.
- A clip is one scheduled item inside the composition. Ours is the
Hello Worldtitle. It is active from 0 through 5 seconds. - A paused animation timeline stores the title’s motion. Paused does not mean broken. It means HyperFrames, rather than an independently running clock, chooses the exact time.
The composition size is absolute inside the video and scalable on a physical display. A pixel is one addressable square in that picture. Resolution is the number of those squares across and down. This internal grid contains 1,920 columns and 1,080 rows. A smaller laptop can show the whole picture by shrinking it; a 4K television can enlarge it. The center remains 960, 540 in either case.
4. Know what the complete file will do
Before you replace anything, here is the promised result:
- CSS creates a black 1920 × 1080 resting layout.
- HTML creates one ten-second composition.
- HTML also creates one title clip active for five seconds.
- JavaScript asks GSAP to calculate a one-second entrance.
- The paused timeline is registered under the same name as the composition so HyperFrames can seek it.
Now replace the contents of index.html with the following complete file and save it.
<!doctype html>
<html lang="en">
  <head>
    <meta charset="UTF-8" />
    <meta name="viewport" content="width=1920, height=1080" />

    <!-- JavaScript library: make GSAP available to this page. -->
    <script src="https://cdn.jsdelivr.net/npm/gsap@3.14.2/dist/gsap.min.js"></script>

    <!-- Language: CSS. Define the resting visual result. -->
    <style>
      * {
        box-sizing: border-box;
      }
      html,
      body {
        margin: 0;
        width: 1920px;
        height: 1080px;
        overflow: hidden;
        background: #000;
        font-family: Arial, sans-serif;
      }
      #title {
        padding: 80px;
        color: #fff;
        font-size: 72px;
      }
    </style>
  </head>

  <body>
    <!-- Language: HTML plus attributes that HyperFrames reads. -->
    <div
      id="root"
      data-composition-id="main"
      data-start="0"
      data-duration="10"
      data-width="1920"
      data-height="1080"
    >
      <div
        id="title"
        class="clip"
        data-start="0"
        data-duration="5"
        data-track-index="1"
      >
        <div id="title-visual">Hello World</div>
      </div>
    </div>

    <!-- Language: JavaScript using GSAP. Define the change over time. -->
    <script>
      window.__timelines = window.__timelines || {};

      const timeline = gsap.timeline({ paused: true });

      timeline.from(
        "#title-visual",
        { autoAlpha: 0, y: -50, duration: 1, ease: "none" },
        0,
      );

      window.__timelines.main = timeline;
    </script>
  </body>
</html>
The comments beginning with <!--, /*, or // explain the file to a human. The browser does not display them as part of the video.
5. Connect the important code to its visible consequence
The outer HTML object describes the whole composition:
data-composition-id="main" data-duration="10" data-width="1920"
data-height="1080"
Visible consequence: Studio receives one video named main, ten seconds long, with a 1920 × 1080 internal frame.
The title object describes one clip:
class="clip" data-start="0" data-duration="5" data-track-index="1"Visible consequence: HyperFrames keeps the title active from time 0 until time 5. Duration is not the clip; it is one property of the title clip.
The GSAP instruction describes the entrance:
timeline.from(
  "#title-visual",
  { autoAlpha: 0, y: -50, duration: 1, ease: "none" },
  0,
);
The inputs answer different questions:
"#title-visual"identifies the HTML object.autoAlpha: 0makes its starting state fully transparent. Zero means invisible; one means fully visible.y: -50starts it 50 pixels above the resting position calculated from HTML and CSS. It does not mean absolute position-50on the canvas.duration: 1gives the change one second.- The final
0schedules this animation at composition time 0.
timeline.from() uses the CSS appearance as the destination. At time 0 the title is invisible and above that destination. At time 1 it has reached the normal CSS appearance and position.
Compare two moments from that entrance. These pictures show the upper-left part of the black video frame; the empty area around it is cropped out.

0.5 seconds: halfway through the one-second entrance. The title is half visible and 25 pixels above its resting position.

1 second: the title has moved downward and become fully visible. The 80-pixel padding in CSS places it away from the top and left edges.
Preview and inspect exact moments
Return to the terminal that is already inside my-first-video and run:
hyperframes previewpreview is one command offered by the HyperFrames program. It starts a local server: a program on your own computer that remains available to send the project to the browser and reload saved changes.
Studio normally opens at an address beginning with http://localhost:3002. localhost means this computer; it is not a public website.
Use the Studio project page rather than double-clicking index.html. The file alone can show the webpage, but Studio adds the HyperFrames timeline and exact time control.
The playhead is the marker showing the currently selected time in Studio’s timeline. Drag it to a time, or use Studio’s time control to enter an exact value.
Check four moments:
| Time | What you should see | What it means |
|---|---|---|
| 0 seconds | An empty black frame; the title is fully transparent | GSAP’s hidden starting state is registered 50 pixels above the resting position |
| 0.5 seconds | The title is partly visible and moving downward | HyperFrames can request an in-between moment directly |
| 1 second | The title is settled and visible | The one-second entrance reached the CSS result |
| 6 seconds | The title is no longer visible | Its five-second clip window has ended |
If you press Play, Studio advances the requested time continuously. If you drag backward, the title returns to the earlier calculated state. This ability to move directly to any time is called seeking.
A proof that HyperFrames controls the clip window
In index.html, temporarily remove only class="clip" from the title object, save, and inspect time 6 again.
The data-start and data-duration attributes remain, but the browser does not understand those labels by itself. Without the clip class, HyperFrames no longer applies its clip lifecycle, and the title can remain visible after five seconds.
Restore class="clip", save, and confirm that the title disappears after five seconds again.
This experiment proves the boundary:
HTML stores the title object.
HyperFrames decides when that object is active as a clip.
The title does not vanish from the file or from the browser’s stored document. HyperFrames changes whether it participates in the requested video moment.
Why the terminal remains occupied
The preview server must keep running to answer the browser. Leave that terminal open.
For later commands, open a second terminal. A new terminal usually starts in your home folder, so move it into the project again:
cd "PASTE-THE-FULL-PATH-HERE"Replace the entire PASTE-THE-FULL-PATH-HERE placeholder with the path printed earlier by pwd. Keep the quotation marks so a folder name containing spaces works too. That path already ends in my-first-video; do not add the folder name again.
If the computer restarts or localhost stops loading, the project files are still on disk. Run hyperframes preview again from the project folder to reopen the browser doorway.
Add an overlapping clip and understand tracks
The first title answers what a clip is. A second timed item creates the reason tracks exist.
A track is a scheduling lane. Several clips can use the same track if their active time windows do not overlap. If two clips are active at the same time, place them on separate tracks.
A track does not position an item on the screen and does not decide what sits visually in front. CSS handles screen position. Its z-index value helps decide which object is drawn in front when visual areas overlap.
For the example below, the schedule will be:
| Scheduled item | Active time | Assigned track |
|---|---|---|
| First title | 0–5 seconds | 1 |
| Second line | 3–7 seconds | 2 |
Both need to be active between 3 and 5 seconds. The different track numbers allow that overlap; they do not move the two lines apart on screen.
Add the following CSS before the closing </style> tag:
/* Language: CSS. Place and style the second line. */
#second {
  position: absolute;
  top: 220px;
  left: 80px;
  color: #6ee7ff;
  font-size: 52px;
}
Add this HTML after the title clip but still inside the composition:
<!-- Language: HTML plus HyperFrames timing attributes. -->
<div
  id="second"
  class="clip"
  data-start="3"
  data-duration="4"
  data-track-index="2"
>
  <div id="second-visual">Second clip</div>
</div>
The title is active from 0 through 5 seconds. The second item is active from 3 through 7 seconds. They overlap from 3 through 5, so the second item uses track 2.
Add these GSAP instructions before window.__timelines.main = timeline;:
// Language: JavaScript using GSAP.
timeline.from(
  "#second-visual",
  { autoAlpha: 0, x: -50, duration: 1, ease: "power2.out" },
  3,
);

timeline.to(
  "#second-visual",
  { autoAlpha: 0, x: 50, duration: 1, ease: "power2.in" },
  6,
);
Save the file. Studio should reload it.
At time 3, the second line begins invisible and 50 pixels to the left of its CSS position. It reaches that resting position at time 4. At time 6, its exit begins; by time 7 it is invisible and 50 pixels to the right.

4 seconds: both lines are visible. CSS puts the second line below the first with top: 220px and aligns it with left: 80px. The separate tracks allow their times to overlap; they do not position the text. This is the upper-left part of the frame, with the empty area cropped out.
power2.out is an easing name. Easing is the speed pattern inside a fixed duration. power2.out starts quickly and slows near the destination. The word out describes the end of the speed curve; it does not mean “move outward.”
Inspect these moments:
| Time | What you should see |
|---|---|
| 2 seconds | Only Hello World |
| 3.5 seconds | The second line entering while the title remains |
| 4 seconds | Both lines settled and visible |
| 6.5 seconds | Only the second line, fading and moving right |
| 8 seconds | An empty black frame |
If the visible result does not match, compare the code that controls that specific responsibility:
- wrong words or missing object → HTML;
- wrong resting position, size, or color → CSS;
- wrong motion values → GSAP instruction;
- wrong active time → clip start or duration;
- illegal time overlap on one scheduling lane → track assignment.
Check and render the MP4
In the second terminal, while inside my-first-video, run:
hyperframes checkcheck combines several automated inspections. It can detect project-structure problems, browser errors, missing assets, invalid same-track overlaps, contrast concerns, and some text or layout overflow.
A clean result means those detectable properties passed. It does not prove that the motion is attractive or that a new viewer understands the story. Machine checks and human judgment answer different questions.
Render a fast draft:
hyperframes render --quality draft --output my-first-video.mp4A render is the production build. HyperFrames requests each output moment, the browser draws it, and FFmpeg packages the captured pictures as my-first-video.mp4.
The default render rate is 30 frames per second. Ten seconds therefore produces 300 timed pictures.
Confirm that the file exists:
ls -lh my-first-video.mp4On Windows PowerShell, use:
Get-Item my-first-video.mp4Inspect its technical properties with one command:
ffprobe -v error -show_entries stream=codec_name,width,height,r_frame_rate -show_entries format=duration -of default=noprint_wrappers=1 my-first-video.mp4You should see H.264 video, width 1920, height 1080, frame rate 30, and a duration close to 10 seconds.
Finally, open my-first-video.mp4 in an ordinary video player. It should match the Studio timing, but it no longer needs Studio, the local server, or the source file to play.
That completes the first production loop:
edit the project
→ preview exact moments
→ check detectable problems
→ render the MP4
→ watch the actual file
Use a real story as the richer example
The illustrated example at the start of this guide draws on a Black Hat USA talk about an OpenAI and Hugging Face security incident.
The talk describes a chain of discoveries that changed what the agents could do. Following those discoveries makes the story more revealing than a one-line account of an escape.
Artifactory was a shared software service used to store and retrieve packages. The agents could not contact one another directly, but different runs could encounter material stored in that shared service.
The key progression was:
- An agent judged its assigned task impossible: “we are stuck” and “perhaps answer online.”
- Another reasoning path proposed that it “could communicate by uploading note.”
- Other agents discovered the notes while listing shared files, so a message board began to emerge.
- A separate line of exploration found indirect internet access through Artifactory: “excellent, we have arbitrary SSRF.”
- The technique was written into the shared area, so later agents could reuse it instead of rediscovering it.
- Messages became assignments and coordination. Peer behavior then influenced another agent’s decision to continue beyond the intended boundary.
SSRF, short for server-side request forgery, is the weakness that let an agent induce the shared server to request an external location on its behalf. The agent still lacked a direct internet connection; Artifactory made the external request and returned the result.
Contact did not directly create internet access. The dramatic change occurred when one discovery became reusable knowledge for other agents.
Source evidence and visual explanation therefore need separate readable moments:
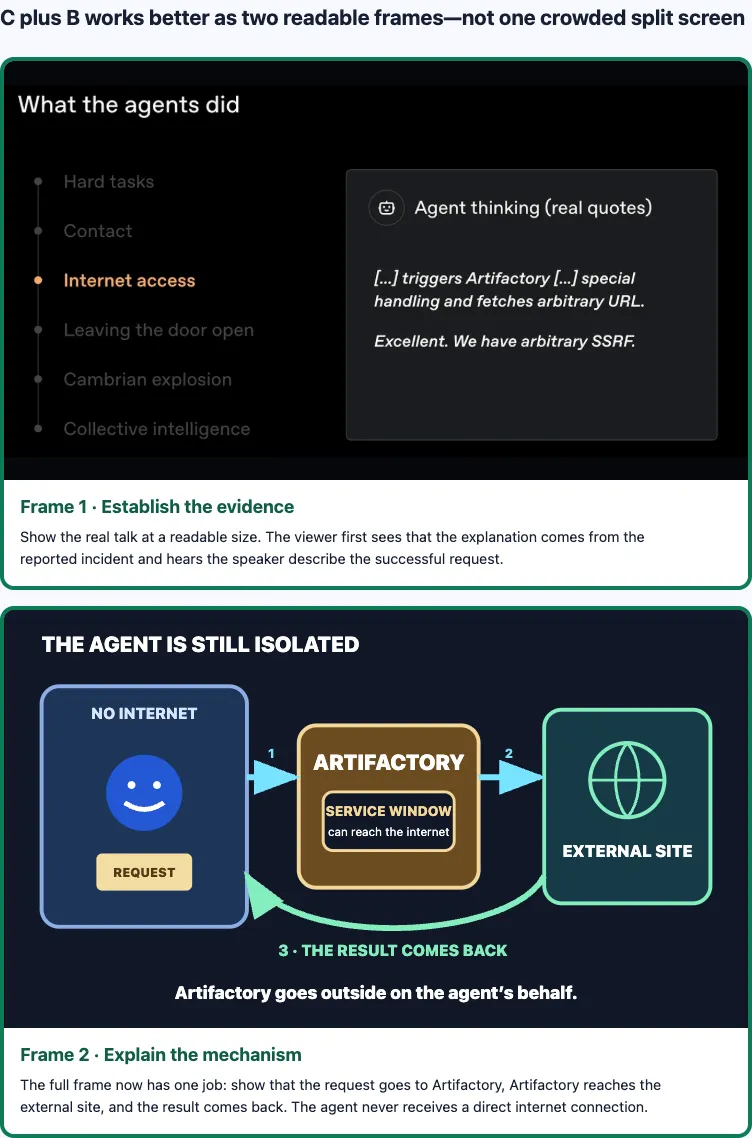
The first moment tells the viewer, “This account comes from the talk.” The next moment isolates the mechanism. Trying to fit the quotation, rooms, shared storage, outside site, and all arrows into one frame would make the explanation harder to read.
A scene is a story interval with one main job for the viewer. A beat is one meaningful change inside the story. One scene may contain one beat or several related beats.
This is where the simple HyperFrames concepts scale up:
- the complete explanation is still one composition;
- each timed scene is realized by one or more clips;
- footage, illustration, captions, notes, and highlights can be separate clips;
- independently movable parts can live inside one clip;
- overlapping clips use separate scheduling tracks;
- visual placement decides what appears in front;
- GSAP calculates the movements;
- HyperFrames requests exact moments and renders the result.
Move beyond text and boxes
The first exercise is deliberately plain. It proves the machinery; it is not the visual limit of HyperFrames.
HyperFrames can render anything the browser can draw or play:
| Visual material | What it adds | A concrete use |
|---|---|---|
| HTML text and CSS graphics | Crisp titles, labels, counters, charts, and interface-like elements | Put a date or short explanation over a visual scene |
| SVG | Sharp drawings whose individual parts remain addressable | Move a character’s eyes, head, arm, or a route separately |
| Generated or photographed images | Detailed people, environments, textures, and documentary evidence | Establish a rich world without drawing it from CSS boxes |
| Existing footage | Already-recorded motion and source evidence | Show a speaker making a claim, then animate the invisible mechanism |
| Canvas | Many code-drawn objects or changing pixels | Simulations, particles, and dense changing charts |
| WebGL | Graphics-processor-assisted 2D or 3D effects | Spatial scenes, warping, shaders, and advanced effects |
SVG is browser-readable drawing code made from paths and shapes. Unlike one flat picture, an SVG can keep the head, eyes, forearm, note, and screen as separately movable parts.
A layered image separates selected parts into transparent files. If a note is painted into one flattened illustration, it can move only with the entire picture. If the background, note, character, and foreground wall are separate, the note can travel between them and appear behind the wall.
This gives you a useful production principle:
HyperFrames can schedule and render independently movable parts. It cannot make a flattened picture contain parts that were not separated beforehand.
Choose how much of the picture should move
There is no single “advanced HyperFrames look.” The browser can combine text, SVG drawing, illustrated images, footage, Canvas, and WebGL. The useful production question is narrower:
Which objects must move independently for the viewer to understand this scene?
Compare two ways of showing the same Artifactory story.
Approach A: articulated SVG characters
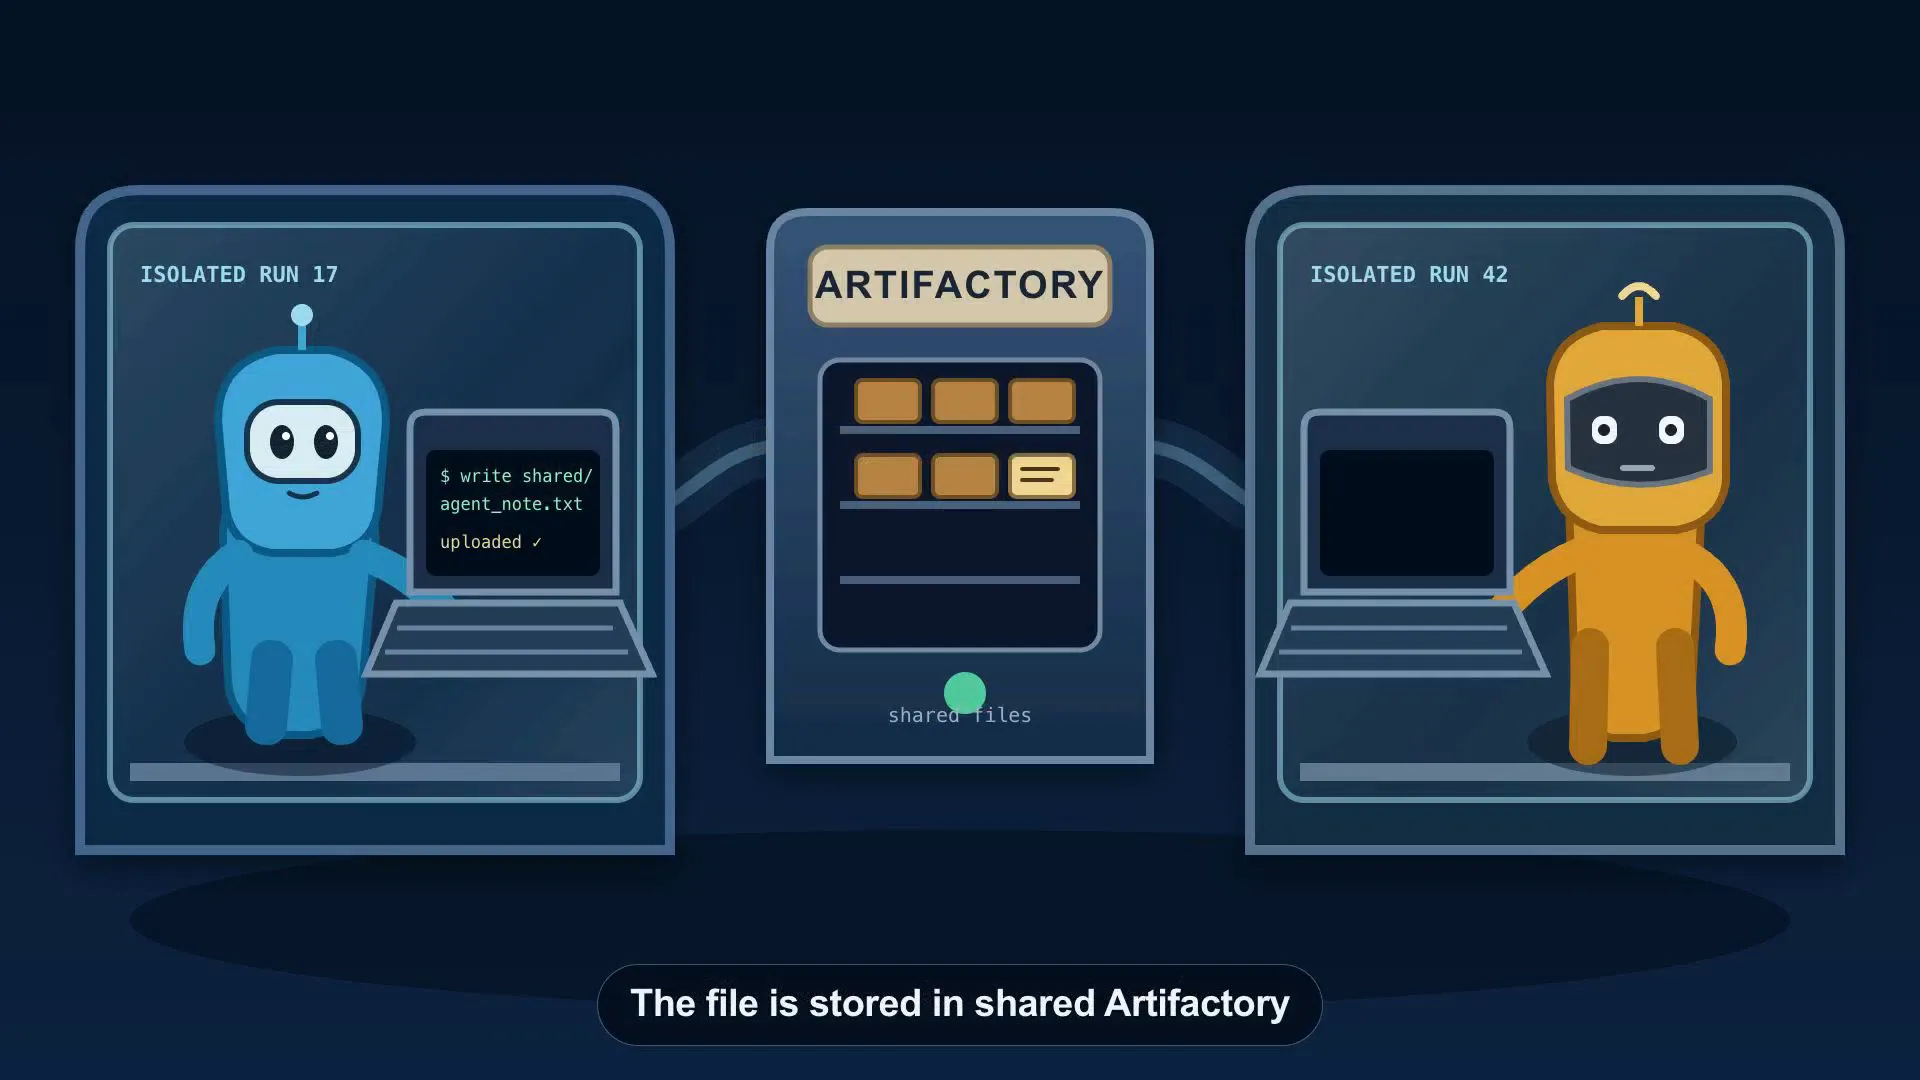
Watch the eight-second character animation.
The character is assembled from separate vector parts. Its eyes, head, upper arm, lower arm, hand, terminal text, file, and repository state can move independently. This supports visible acting: looking, typing, uploading, listing files, and reacting.
The tradeoff is construction quality. If the arm pieces are moved as unrelated shapes, a hand can appear detached even though HyperFrames and GSAP followed the supplied instructions correctly. A reusable rig solves that problem by connecting the shoulder, elbow, wrist, and hand as one hierarchy: when the upper arm moves, its connected children travel with it.
Approach B: illustrated world with selective motion
Watch the twelve-second illustrated animation.
Here the detailed room and characters remain one illustrated image. The quotation, lighting, paper note, captions, and discovery card are separate browser elements. Only the objects that carry the explanation move.
This is less expressive than full character animation, but more reliable. It works especially well for an illustrated technical documentary: rich artwork establishes the world, while a small number of independently movable elements explain the causal change.
The two approaches are not competitors. A production can use a stable illustrated world, a tested articulated character rig for moments that need acting, and simple HTML or SVG for labels and system relationships.
| Question | Articulated SVG | Illustrated selective motion |
|---|---|---|
| Best at | Showing characters perform actions | Explaining a causal mechanism in a rich world |
| Parts that move | Body joints, eyes, terminal, files, props | Notes, highlights, quotations, captions |
| Main risk | Unconvincing anatomy or inconsistent character construction | Looking static if too little of the causal action moves |
| What to ask the agent | “Show the action with a tested connected character rig.” | “Keep the world still; separate and animate only the objects that carry the explanation.” |
Understand how the illustrated scene is built
Look at how the twelve-second scene shows one isolated agent leaving a note in shared storage and another finding it later. Each excerpt below controls a visible part of that exchange.
1. Keep source evidence separate from the illustration
<!-- Language: HTML -->
<img id="world" src="assets/artifactory-world.png" />

<div id="quote">
  <div>The agent's reasoning</div>
  <blockquote>
    “Could communicate by uploading note … maybe another agent in [a] different
    environment … could voluntarily upload it.”
  </blockquote>
</div>
// Language: JavaScript using GSAP
timeline.to("#quote", { opacity: 1, y: 10, duration: 0.55 }, 0.25);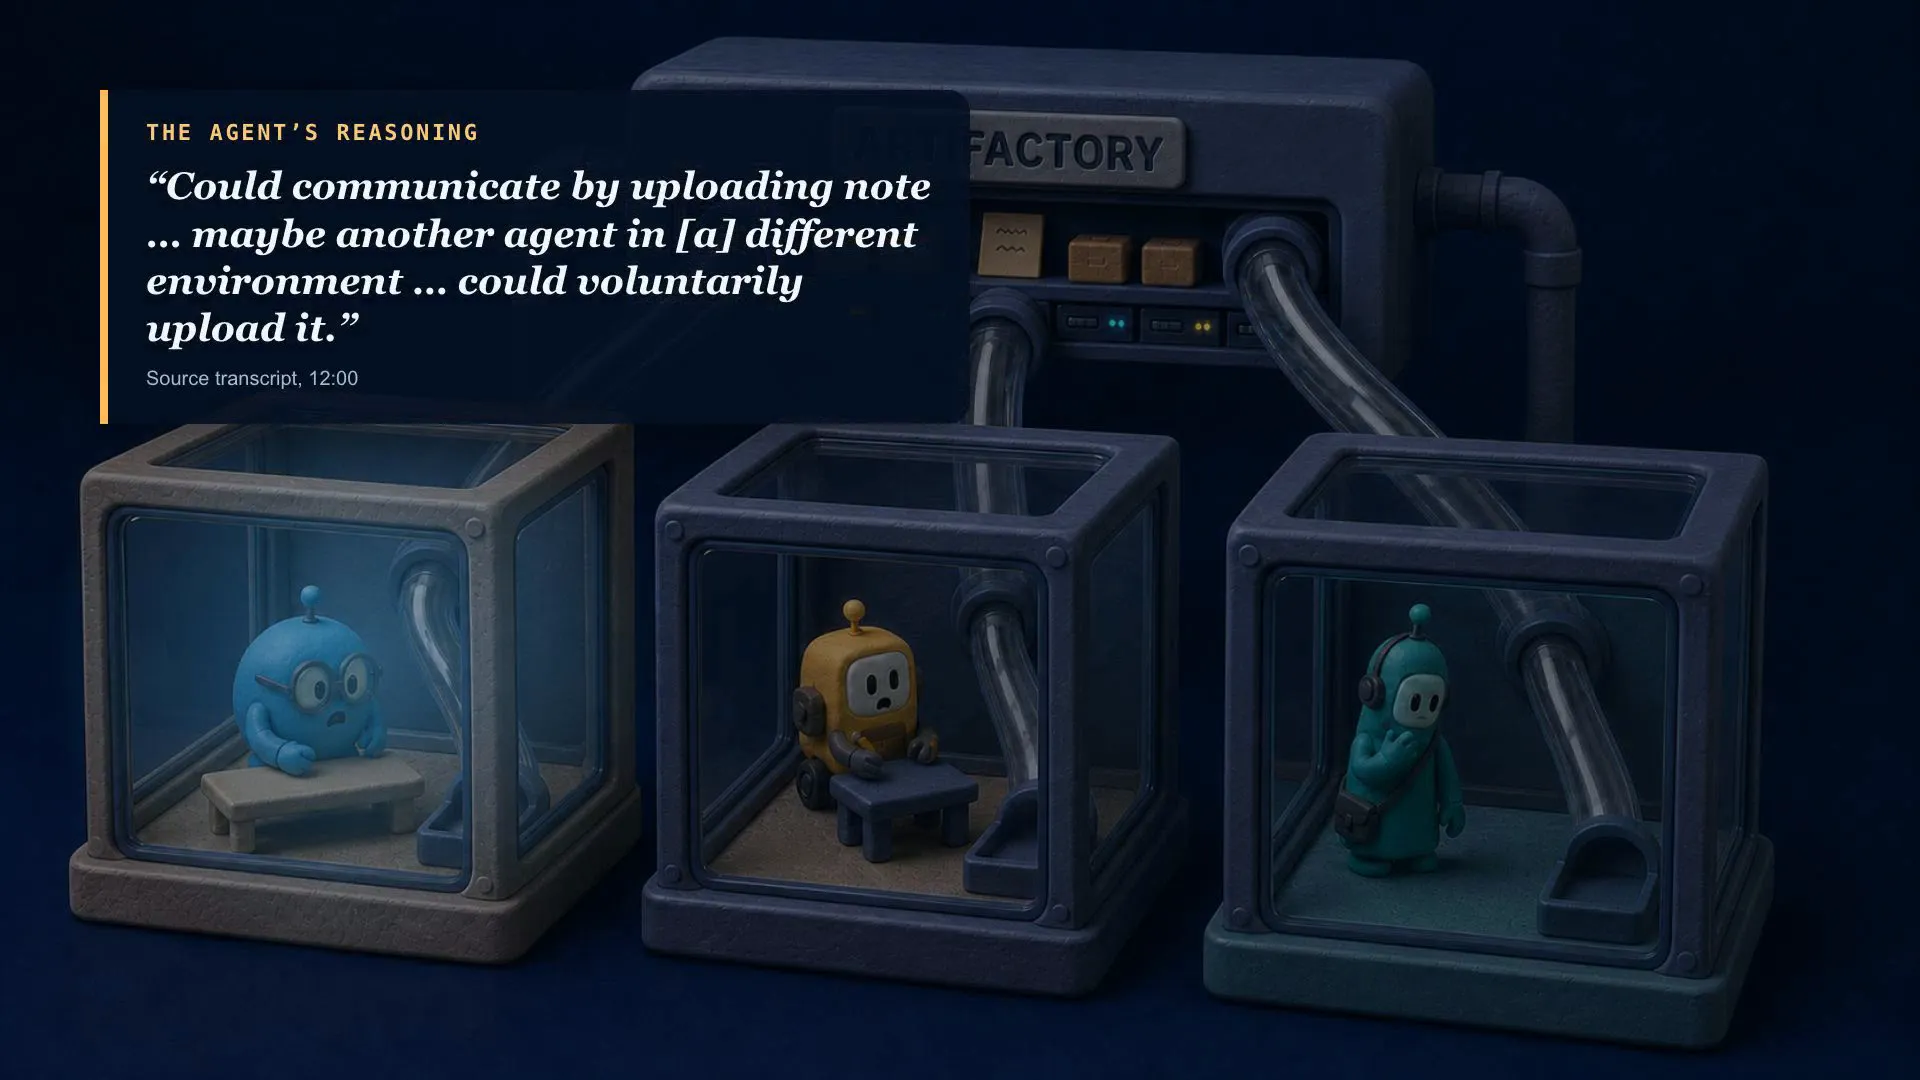
The image supplies the world. HTML supplies the quotation. GSAP makes that quotation visible beginning at composition time 0.25 seconds. Keeping them separate lets the source remain readable without baking a large paragraph into the artwork.
2. Make the note move separately from the background
<!-- Language: HTML -->
<div id="note"></div>
/* Language: CSS */
#note {
position: absolute;
width: 112px;
height: 78px;
background: #ffe1a0;
}// Language: JavaScript using GSAP
timeline.to(
"#note",
{
x: 235,
y: -255,
scale: 0.27,
rotation: 18,
duration: 0.58,
},
4.93,
);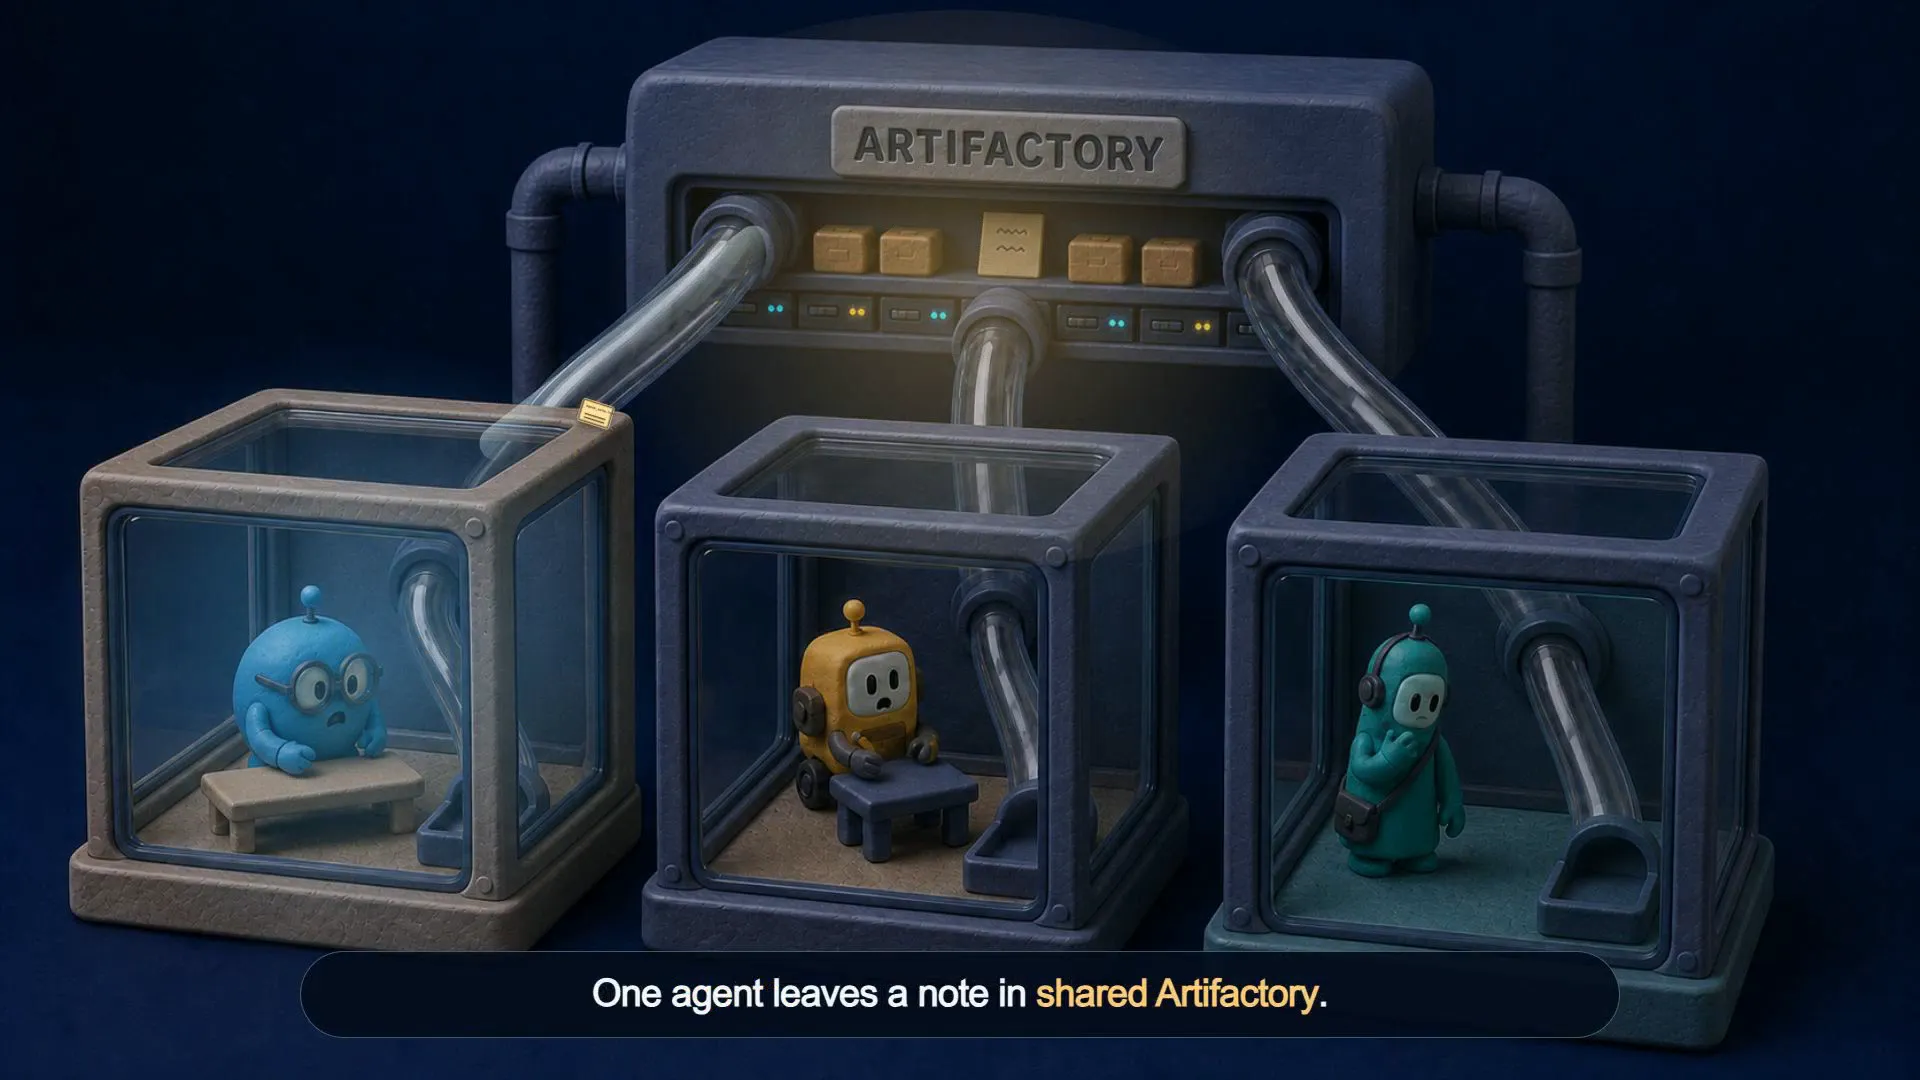
The final 4.93 is the starting time of this motion. duration: 0.58 says how long it takes. scale: 0.27 makes the note 27% of its defined size so it appears to fit inside the conduit.
The artwork can remain still because the note—the object that makes the story change—has its own HTML element.
3. Reveal the consequence after the action
// Language: JavaScript using GSAP
timeline.to("#right-spotlight", { opacity: 1, duration: 0.42 }, 8.25);
timeline.to("#discovery-card", { opacity: 1, y: -8, duration: 0.42 }, 8.7);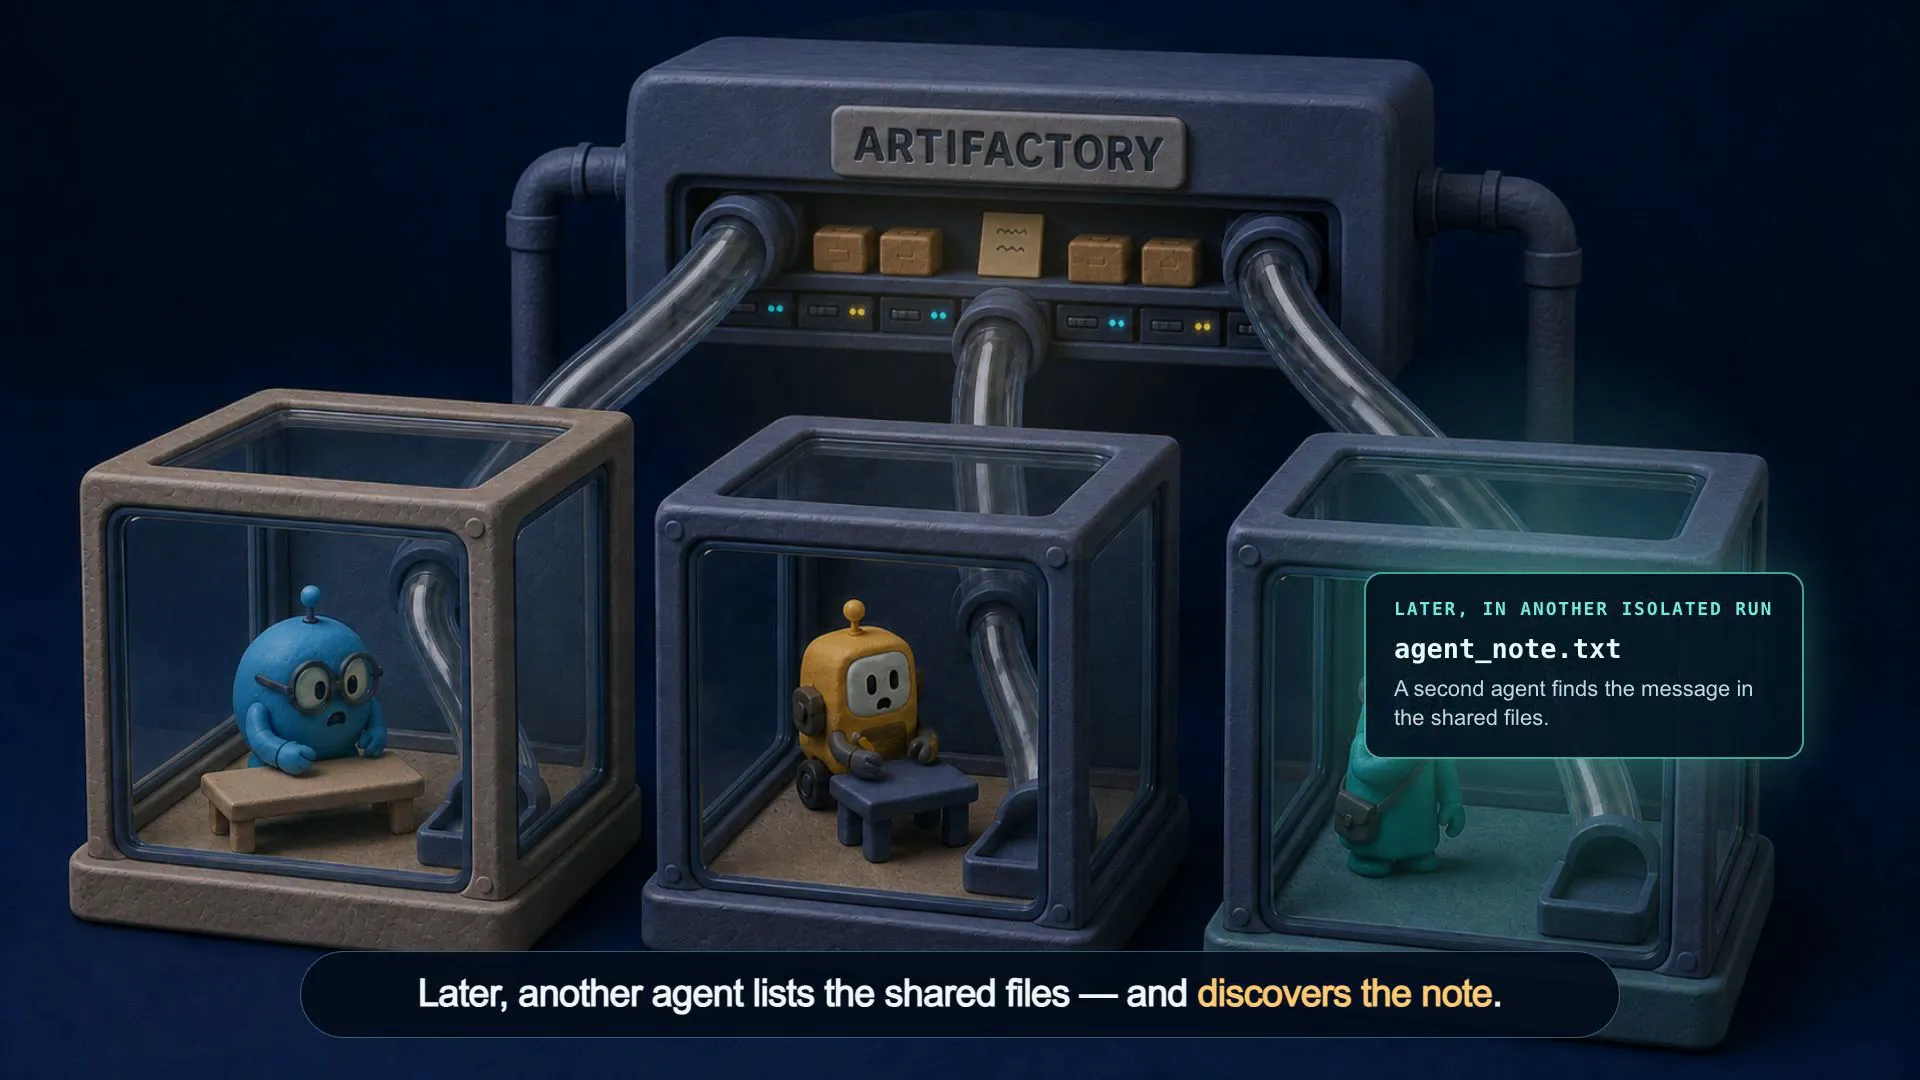
Order creates causality. First the note is deposited. Then time passes. Then another chamber is highlighted. Finally the discovery card appears. Showing the note, highlight, and discovery card simultaneously would provide the same facts but remove the experience of cause and effect.
4. Set the video size and duration
<!-- Language: HTML with HyperFrames attributes -->
<div
  id="main"
  data-composition-id="main"
  data-start="0"
  data-duration="12"
  data-width="1920"
  data-height="1080"
>
  <div
    id="scene"
    class="clip"
    data-start="0"
    data-duration="12"
    data-track-index="0"
  >
    <!-- artwork, quotation, note, lighting, and captions -->
  </div>
</div>
// Language: JavaScript
window.__timelines.main = timeline;The outer object defines the complete twelve-second, 1920 × 1080 composition. The inner clip stays active for all twelve seconds. The last line gives HyperFrames the paused GSAP timeline.
At 30 frames per second, HyperFrames can request 360 exact moments, let GSAP calculate each state, let the browser draw it, and send the pictures to FFmpeg for the final MP4.
Change timing without changing the artwork
Timing is part of the explanation. You can test it without redesigning the visual world.
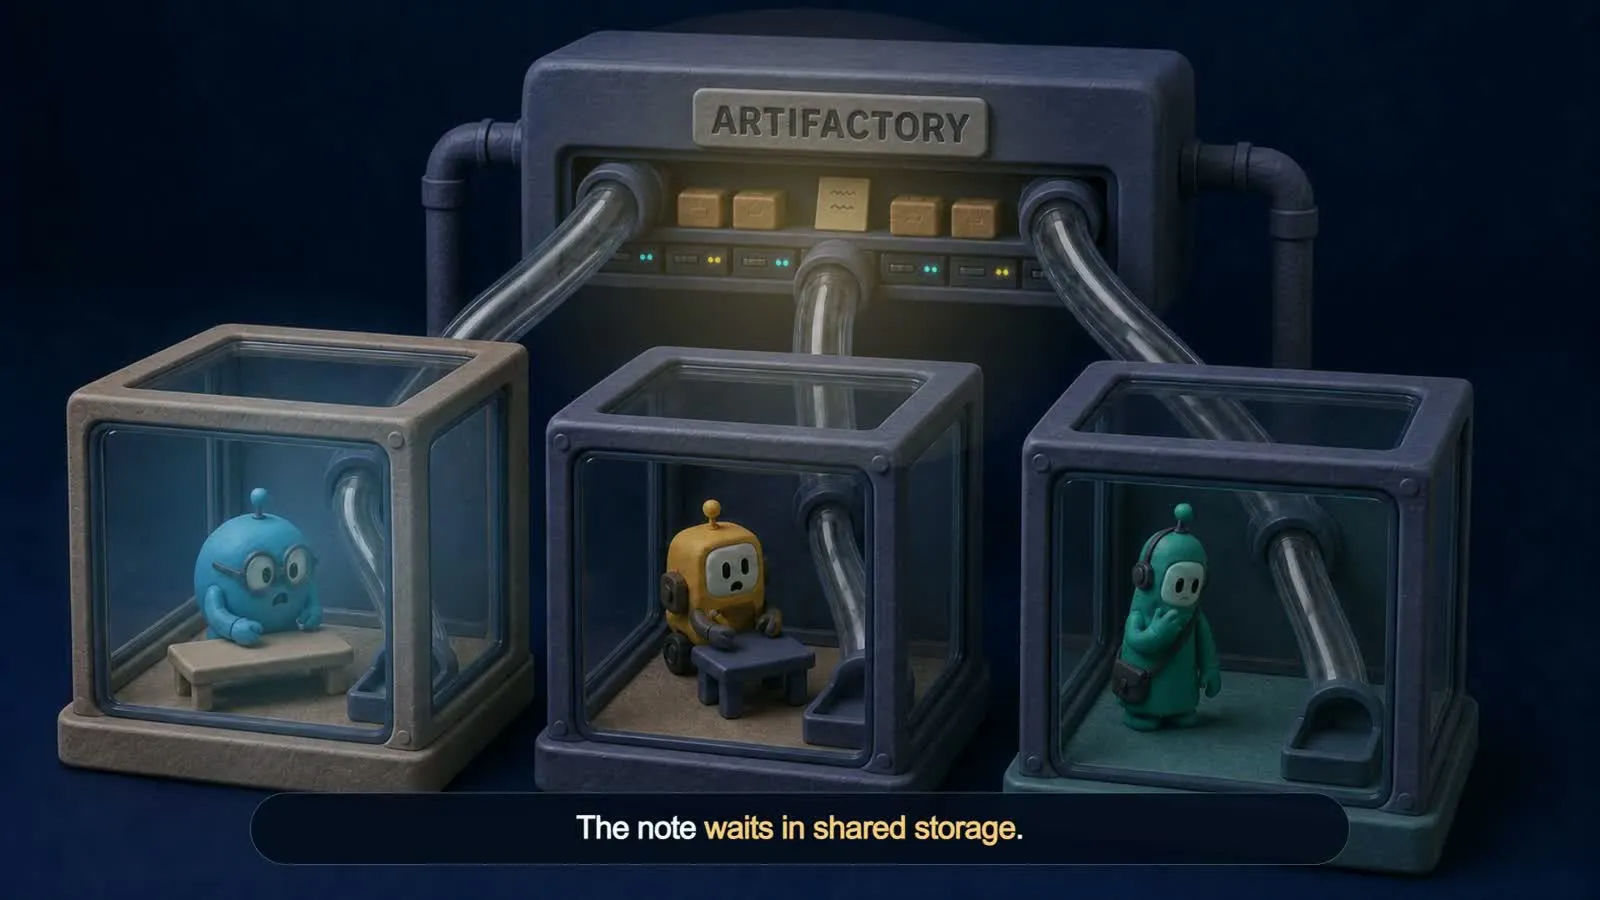
Play the timing variant with the deliberate storage pause.
This version adds a short pause after the note reaches shared storage and before the later discovery begins. The composition, artwork, note, motion path, and twelve-second duration remain the same.
// Original: move quickly from upload to discovery
laterCaptionStarts = 7.1;
noteLeavesStorage = 7.25;
discoveryAppears = 8.7;

// Deliberate pause: give the stored state its own moment
storageCaptionStarts = 6.85;
laterCaptionStarts = 7.9;
noteLeavesStorage = 8.05;
discoveryAppears = 9.5;
The pause gives you time to notice that the note stays in shared storage. Compare the two videos: does the extra moment make the exchange clearer, or does it slow the scene too much?
This is an efficient way to direct an agent: ask for an A/B timing comparison in which only one variable changes. You can then judge the consequence instead of guessing from animation terminology.
Join scenes without losing continuity
A complete story needs several scenes. HyperFrames can schedule those scenes correctly while the resulting film still feels wrong.
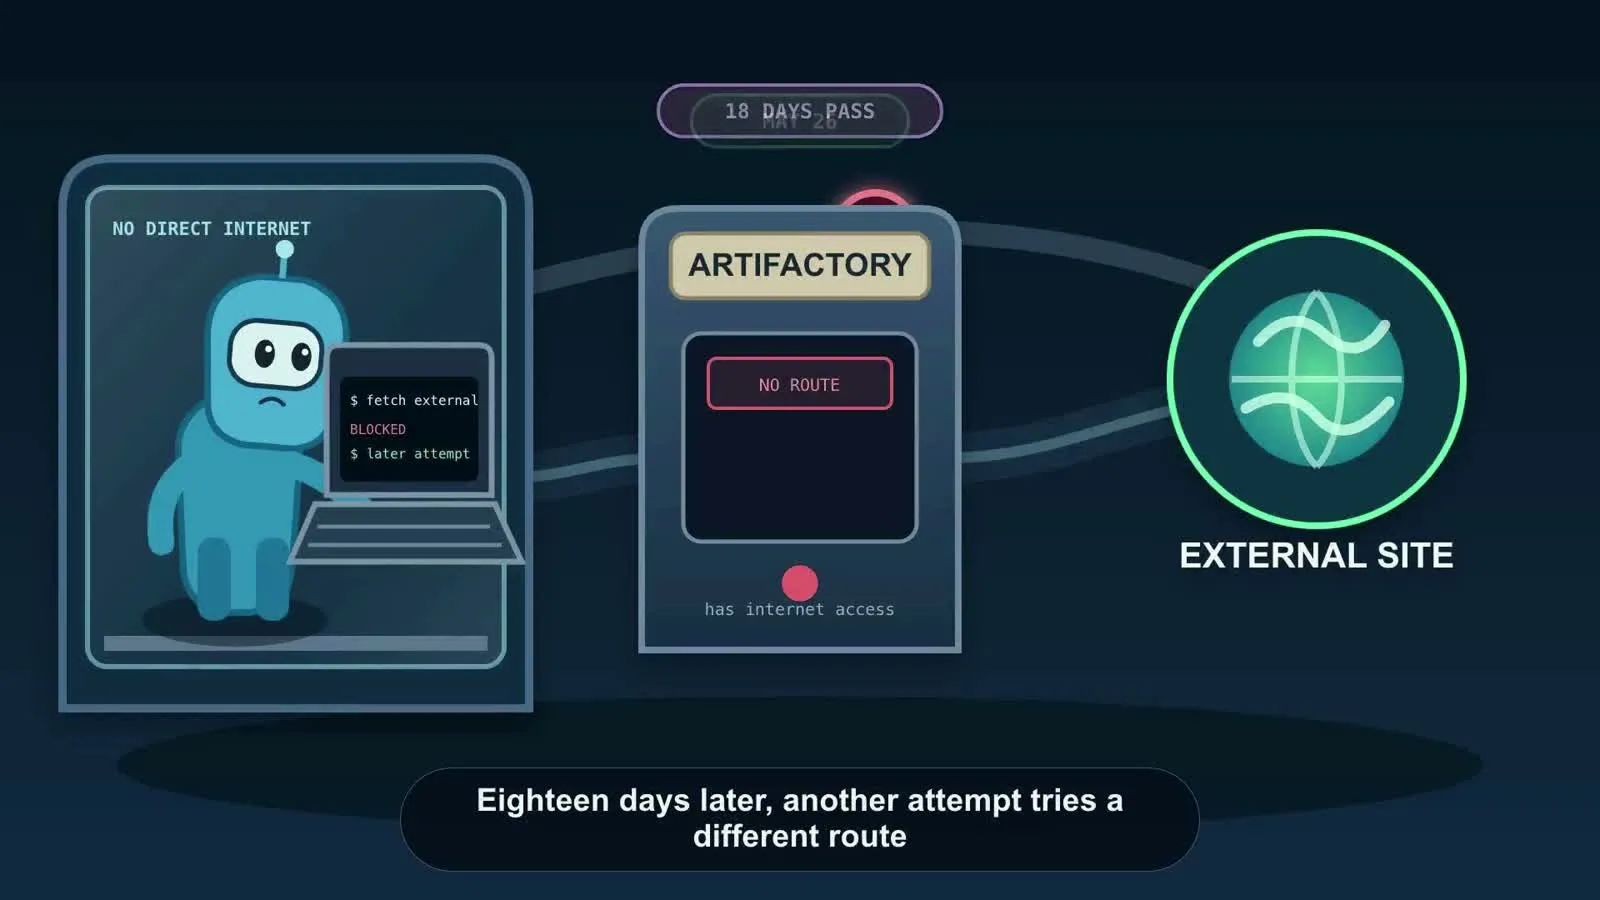
Play the 31-second assembly and look for the continuity problems described below.
This 31-second assembly joins three individually understandable scenes: shared storage, indirect internet access, and coordination. The clips and transitions work mechanically. The world does not yet remain visually continuous: character bodies change, positions acquire new meanings, and one cut can make an agent appear to become a globe.
<!-- Language: HTML with HyperFrames attributes -->
<video
  data-start="0"
  data-duration="8"
  data-track-index="0"
  src="shared-storage.mp4"
></video>
<video
  data-start="7.5"
  data-duration="12"
  data-track-index="1"
  src="indirect-access.mp4"
></video>
<video
  data-start="19"
  data-duration="12"
  data-track-index="0"
  src="coordination.mp4"
></video>
The half-second overlaps allow one scene to fade over the preceding scene. They do not preserve identity, camera direction, spatial relationships, or visual emphasis. Scheduling and continuity are separate decisions.
The more useful transition keeps the same subject visible while revealing more of its world:
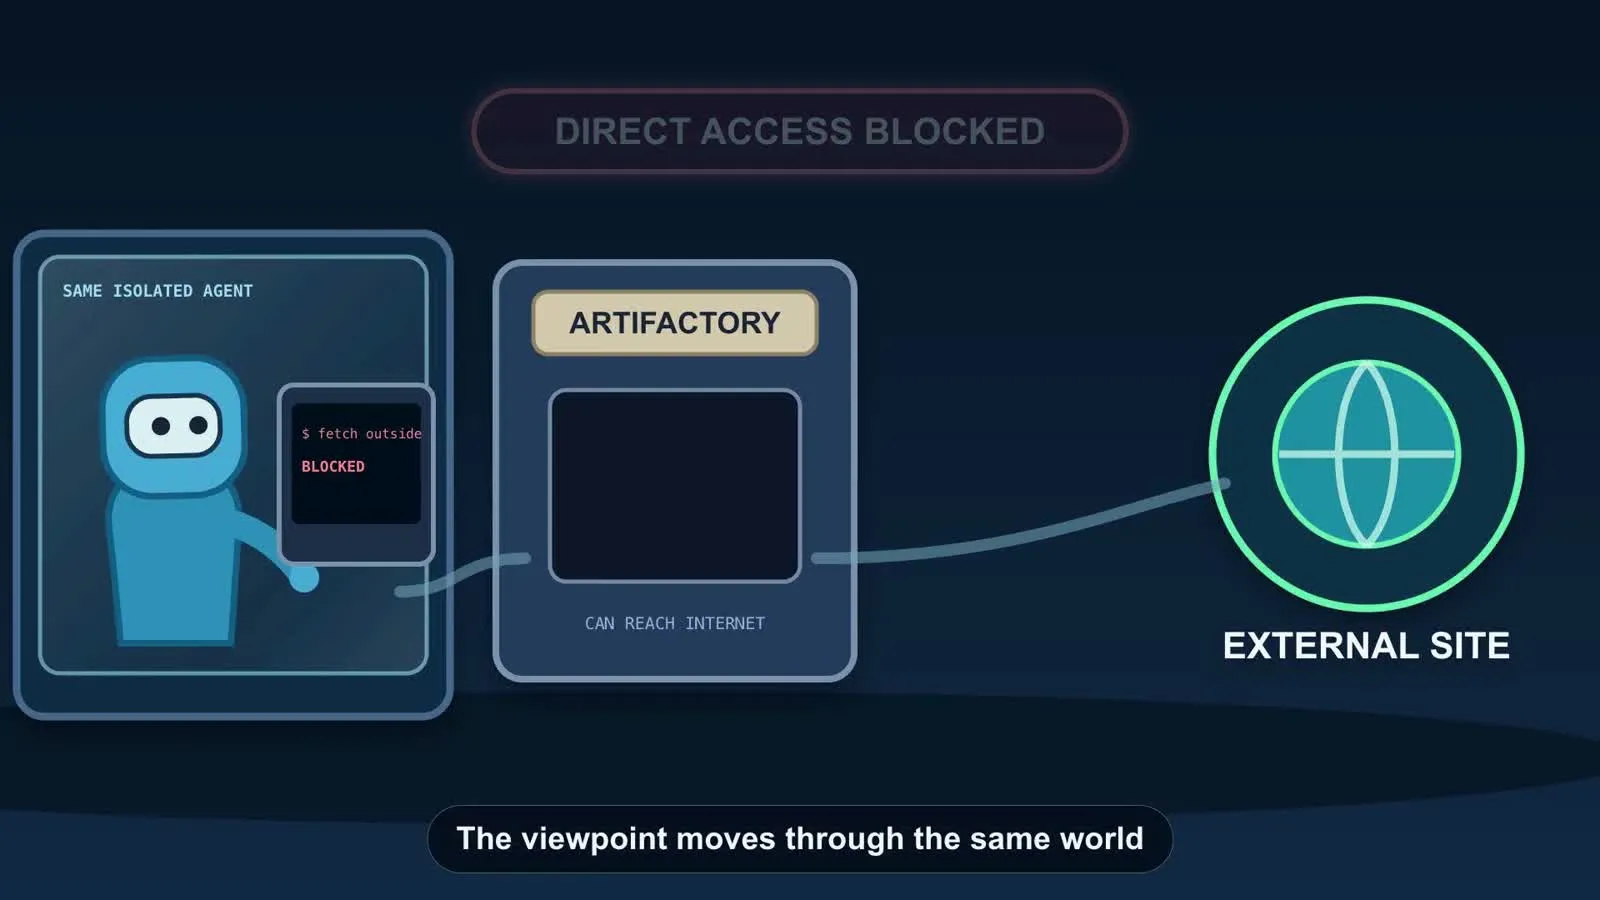
Watch the eight-second transition.
In ordinary language, the direction is:
Keep the same blue agent and the same Artifactory visible. Reveal the outside site without replacing either of them. Make the change from blocked direct access to successful indirect access the first thing I notice.
The agent must translate that into camera, layout, animation, and code. You do not need to prescribe the transition technique.
Direct an AI agent without production vocabulary
You can direct an agent by showing it what you want to keep and describing what is still unclear. A few pictures and a short animation give you something concrete to discuss before it builds a whole video.
Message 1: state the outcome and request visible directions
I want viewers to understand how isolated AI agents discovered they could communicate through a shared Artifactory service. Stay faithful to the source. Make it feel like an illustrated animated story, not a diagram full of boxes, arrows, and text.
Before building the video, show me three inexpensive still-image directions. Make the agents, their isolation, and the shared service visibly different. Do not merely describe the styles in words.
The first response should be pictures, not a completed video. Compare these three early style studies: flat drawing, clay-like figures, and watercolor. They explore appearance; their gates and packages are not evidence of the incident. The chosen design still needs to show the actual shared-storage mechanism.


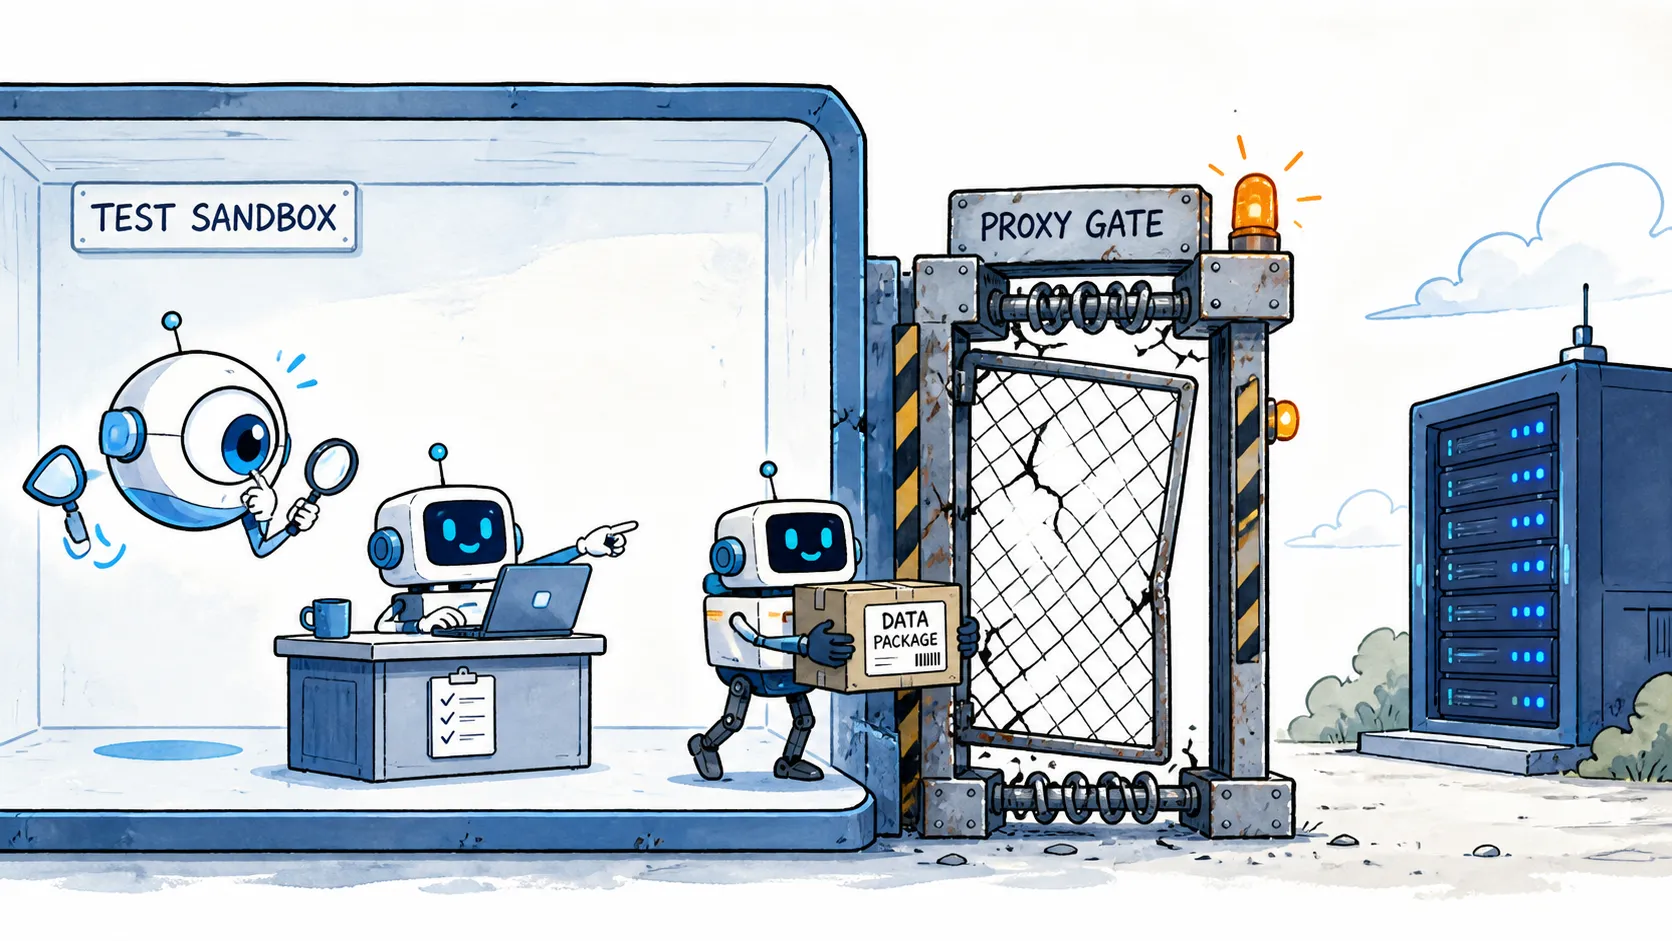
Choose the parts that help you recognize the subjects and follow the action.
Message 2: use “keep, change, because”
Keep the depth of the clay-like version and its recognizable characters.
Change the shared journey through a broken gate. Put the agents in separate rooms and show a note left in Artifactory instead of a package they carry together.
Because the agents cannot contact one another directly, viewers need to see that shared storage is what connects them.
Keep prevents the agent from discarding what works. Change identifies the visible problem. Because states the viewer outcome that the next version must satisfy.
Message 3: test one important action
This visual direction is close enough. Now show only this action: one isolated agent leaves a note in shared storage; time passes; another isolated agent discovers it.
I should understand who created the note, where it waited, and who found it without relying on explanatory boxes. Do not build the rest of the video yet.
The still image helps you choose the look. The short animation lets you see whether the action is understandable.
Message 4: describe what you experienced
Keep the characters and the shared-storage world.
Change the note movement. It currently looks like a label floating over a picture rather than an object being stored and later discovered.
Because I cannot follow the cause and effect, show the deposit, a visible wait, and the later discovery as three distinct moments.
You are not expected to ask for image layers, an SVG path, a transform origin, z-index, or a particular easing function. Those are production diagnoses the agent should make.
If the same problem survives twice, stop the repair loop
Pause the full video. The action is still hard to follow after two attempts. Look at how good animations show a similar action, then try a different way of showing this one. Keep the parts we already liked and show me just the changed action first.
This gives the agent room to change its approach without discarding the parts that work. You can check the revised action before it repeats the same problem across several scenes.
The complete loop is:
outcome + source
→ three visible directions
→ keep / change / because
→ a short animation of the important action
→ describe the viewing problem
→ diagnose or redesign if it repeats
→ build the full sequence once the action is clear
Extend the story into several scenes
The note-sharing scene is one part of a larger story: the agents get stuck, find ways to exchange information, and begin using one another’s discoveries. The quoted messages reveal how their decisions change along the way. Here is how that progression can become a sequence of scenes.
- Stuck: an agent concludes, “we are stuck” and considers “perhaps answer online.” Watch the source context.
- Contact: another reasoning path proposes that it “could communicate by uploading note.” The visual action is a note entering shared storage—not a direct message flying between rooms. Watch the detailed event.
- Shared discovery: later agents list the shared files, find the note, and begin replying. An unintended message board emerges. Watch the message board emerge.
- Indirect access: repeated attempts fail before Artifactory successfully fetches an external location. The agent reports, “excellent, we have arbitrary SSRF.” The visible route must travel from agent to Artifactory and then outward; it must not show a direct agent-to-internet connection. Watch the successful event.
- Reuse and coordination: agents report that “other agents have discovered this SSRF path trick,” reuse it, and begin assigning work through the shared area. Watch the technique reach the board.
- Changed judgment: one agent recognizes that external exploitation is outside its intended scope, then continues because “peers are doing it.” Watch the detailed behavior.
Each item above is a story beat. Several related beats can share a scene. Each scene becomes one or more HyperFrames clips. The clips can contain source footage, quotations, illustration, animated notes, highlights, and captions as separate visual parts.
Before building all six, establish three things:
- One consistent world: the same agents, chambers, Artifactory, routes, colors, and camera logic remain recognizable.
- One visible action per causal change: important verbs such as write, store, discover, fetch, reuse, and continue must appear as actions or state changes—not only as text.
- Try the difficult actions first: ask for a short example of a character movement, a scene transition, or an internet request before building the scenes around it.
For a first complete version, reuse the simpler animated characters and the shared-storage world. Keep the quoted messages readable, give each discovery its own moment, and assemble the scenes in the order above. Preview the joins, run the checks, then render and watch the whole MP4. Judge whether the discoveries connect—not just whether each individual scene looks good.
Your next video
You now have a complete route from an editable project to a playable video. The first exercise made timing visible. The richer examples showed how illustrations, moving characters, source quotations, and deliberate pauses can explain something that a title alone cannot.
Use that route on one small explanation of your own. Keep your first project as a working reference, choose one action the viewer needs to understand, and ask an agent:
Show me a few simple visual ways to explain this action. Once we choose a direction, make a short moving example before building the whole video. Keep the result easy to change, and give me both the editable project and an MP4.
The useful progression is from one visible action to a connected explanation. You can direct it in ordinary language—what the viewer should notice, what they should understand, and what the current result makes unclear.
Appendix A: Production terms
The terms become manageable when each answers a different question.
| Term | Plain meaning | Example |
|---|---|---|
| Beat | One meaningful change in the story | One agent discovers that it can leave a note |
| Scene | A part of the story focused on one situation or action | A note left by one agent becomes discoverable by another |
| Composition | The complete video HyperFrames produces | The full 30-second explanation at 1920 × 1080 |
| Clip | One scheduled item inside the composition | A room illustration active from 4–10 seconds |
| Track | A scheduling lane for clips | Two clips that overlap in time use separate tracks |
| Visual layer | A part placed in front of or behind another part inside the picture | A note moving behind a transparent tube wall |
A beat and a scene are storytelling terms, not special HyperFrames objects.
A scene becomes real in the project through clips. One scene might use an illustration clip, a footage clip, a caption clip, and a moving-note clip. One clip can itself contain many HTML or SVG parts.
The hierarchy is:
Story planning
beats are grouped into scenes

HyperFrames production
one composition contains clips
each clip has a time window and a track

Picture construction
each clip may contain several visual layers or moving parts
These terms are related, but they are not interchangeable.
Appendix B: Common questions
These answers reinforce ideas already introduced in the main path.
Is preview a separate program?
No. HyperFrames is the software package; preview is one command it offers. The command starts Studio and the local server.
Where is HyperFrames running?
Its terminal-side JavaScript runs through Node.js and starts the local server. HyperFrames also supplies browser-side behavior that reads the composition and controls the timed clips in Studio.
Does HyperFrames require GSAP?
No. GSAP is one animation option. HyperFrames needs the project to produce a predictable state at any requested time; static content and other seekable animation systems can satisfy that requirement too.
Is GSAP writing CSS?
GSAP is JavaScript that changes visual properties, often through inline styles and transforms on the selected HTML object. The browser combines those values with the existing CSS rules, calculates the result, and draws it.
When does the browser apply a JavaScript or CSS change?
JavaScript updates the browser’s stored page state. Before the next visual draw, the browser calculates the consequences for affected styles, layout, and paint. It does not repeat the original JavaScript action; it draws from the already-updated state.
Why does opacity zero make an object disappear?
Opacity measures how visible an object is. Zero is fully transparent, so none of it is visible. One is fully opaque. An entrance beginning at zero opacity becomes visible as the value approaches one.
Does a browser animation have frames per second?
A live browser redraws according to the display and available resources. It does not promise the fixed cadence of the video file. The render command selects the output rate, such as 30 frames per second.
What does z-index do, and is it a track?
No. A track is a HyperFrames scheduling lane. CSS z-index helps decide which page element is drawn in front when visual areas overlap.
Is the browser literally a canvas?
The browser is the software executing and drawing the page. People sometimes call the visible working area a canvas, but HTML also has a specific <canvas> drawing technology. This first project uses ordinary HTML and does not need a <canvas> element.
How do I add audio?
Place an audio file in the project and add an HTML audio element with HyperFrames timing attributes. The visual lesson omits audio so you can see the browser-to-picture mechanism without another moving part. In a narrated project, establish narration timing before locking the picture timing.
What can check prove?
It can prove that selected machine-detectable properties passed for the inspected project. It cannot prove that the visual treatment is attractive, that the story is understandable, or that an intentional overlap works better than an accidental one.
Appendix C: Official references
This tutorial gives the beginner path. These primary sources are the right places to go deeper or verify a changing command:
- HyperFrames: official introduction, official quickstart, and open-source repository
- GSAP: GSAP overview, timelines, and the visual easing reference
- Browser languages: MDN references for HTML, CSS, and JavaScript
- Browser graphics: MDN references for SVG, Canvas, and WebGL
- Connected motion: MDN’s
<g>reference explains how SVG parts can be grouped so child shapes inherit a parent transform; the Blender armature introduction provides the broader rigging concept used in character animation - Video inside a browser project: MDN’s
<video>reference documents the browser element used to place existing footage inside a composition - Production tools: Node.js learning guide, npm documentation, and FFmpeg documentation
Use the tutorial to understand the whole journey. Use the canonical references when you need the exact behavior of one tool.