An AI agent runs on a machine, and that machine shapes what it can deliver: what’s installed, how it’s configured, what the agent is allowed to do. This piece is about that machine.
I erased one of mine and rebuilt it from scratch, from one folder of files anyone can read. This is how, and why.
Prefer video? Here’s the full walkthrough:
Why start over
My machine is where I do my own work every day, and it’s also where new agents, new tools, and new ways of running them get tried first, because the biggest potential in this field is at the front of it, and you only learn what works by using it. Most of what’s on it I built myself, with the agents. I call it AIOS, an AI operating system: the agents I sit with and the ones that run on their own across my machines, the instructions and skills they share, the memory they keep in common, and the rules that decide what they may do without asking me. I’ve rebuilt that system several times. Each version taught me what the next one needed, and each new version went on top of the machine that had carried the last one. Over a few years the machine came to hold pieces of several attempts, and telling what was current, what was half-built, and what was left over took longer than it should.
So the question I’ve been asking myself: if I were to start from scratch, knowing what I’ve learned over the past few years, how would I do it?
The machine is there so a team of agents can do real work and ship it. What I want from it, as I see it today, is this. A base I can reset and trust, so every new version of the system starts clean. To understand any piece of the base on demand: what it is, why it’s there, what depends on it, whether it still earns its place, how to take it out. When something breaks, to put the setup back to yesterday, when it worked. And whatever the agents add, I decide what stays.
You might want the same thing for a different reason. If you build and rebuild your own systems, you already know why a clean base matters. If you’re earlier than that, you’ve vibe-coded something, it works, and you want to put it on a more professional footing, the base is where that footing starts. It’s the same footing the best-run setups stand on, and it’s the part you can copy today, with an agent beside you to explain any line you don’t understand.
I could clean up the machine I have. But that would fix it once, and the way it grew wouldn’t change. So I decided to start from an empty machine, with something in place that keeps it accountable from the first day.
Martin Fowler has names for both machines. A snowflake server is one that was set up by hand, change by change, until nobody can build another like it and everyone is afraid to touch it. A machine that grows for a few years the way mine did becomes one. A phoenix server is one you can burn down and bring back from its description, so you do it on purpose and often, and you find out early when the description has drifted from the real thing. That is what this piece builds. Fowler wrote about servers in a data center, where change is constant and every change is deployed. A personal machine used to be the opposite: set up once, then left alone. A machine with agents on it changes every day, the way a server does, so the same practice now pays on a laptop.
The idea
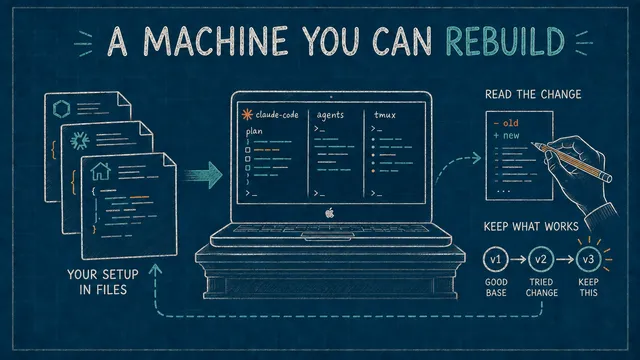
Here is the idea. The machine’s setup, the apps, the tools, the settings, and which version of each, is written in a list, and the machine is built from the list. To change the setup, you change the list. What you build with the agents lives in its own projects, and when a project turns into a tool worth keeping, it gets added to the list like anything else. A Mac keeps several manual steps outside the list; those are written down too. What this gives me: run the list on any new Mac and you get the same machine. A change to the setup shows up in the list, so I can see it and undo it. And nothing stays without going through the list, so whatever the agents add, I say yes, and the reason is written next to it.
This doesn’t mean an agent has to stop and edit the list before it can try anything. Trying is free: install it, use it, see. The list is for what stays. A rebuild removes the apps that aren’t on it and never touches your own files, a small script shows what else has crept in, and the full test is the one this piece performs: erase the machine, run the list, and only what’s written comes back. Keeping something means adding it, with a reason. Trying is a step. Keeping is a decision.
If you’ve written code, you already know this pattern: it’s how a code repository works, applied to the machine. The setup is a set of files, a change is a diff you can read, and the setup can be put back to any earlier state.
What this guide covers
This guide builds the foundation for working with agents. We install Claude Code, Codex, and OpenCode. We choose the terminal, the editor, and the multiplexer with that work in mind. A multiplexer is the tool that lets several agents run side by side in one window. Agent instructions, skills, and coordination are beyond this guide. The list also doesn’t tidy your projects. The half-finished experiment and the script nobody remembers asking for are a different problem. What the list gives you is a known base to sort them against.
If you come from vibe coding, or you don’t have a developer background, a fair question is whether you can do this. Before AI, mostly not: this way of running a machine is a small language of its own, and parts of it were hard for me. That has changed, and this guide assumes no more than the agents you already use.
If you manage production infrastructure, you already work this way: systems described in files, changes reviewed, rollbacks ready. This brings the same practice to the machine you actually sit at, often the one system that never got written down.
Here’s the plan. I start from a fresh Mac. Run one command, watch the machine come back, then we go through the files and I explain what each part does and why it’s there, so the machine you end up with is one you understand and can change.
Before you start
You need a Mac with Apple Silicon, an internet connection, and a GitHub account. The folder is at github.com/agenteer/dotfiles. It was built and tested on a fresh Mac; its README covers what to check on a Mac already in use.
When macOS asks you to set up Touch ID during its first-run screens, enroll a fingerprint. The folder turns on Touch ID for the password prompts you’ll meet later, but it cannot enroll the finger for you.
Build the machine
Install git and the command line tools
Open Apple’s Terminal: press Command-Space, type Terminal, press Return. Then type:
git --versionOn a fresh Mac this does not print a version. A dialog appears instead: “The git command requires the command line developer tools. Would you like to install the tools now?” Click Install, then Agree. This is Apple’s Command Line Tools package. It includes git and the compilers that developer tools on a Mac depend on. It is the one install here that comes from Apple rather than from the folder, and it takes a few minutes.
While it installs, look at the folder we are about to use. Open github.com/agenteer/dotfiles in a browser. Start with three files:
flake.nixis the entry point. It names the pieces the machine is built from and where each comes from.home.nixis your account: your tools, your shell, your editor, the three coding agents, and your settings.configuration.nixis the Mac itself: system settings and the Mac apps, the things every account on the machine sees.
Then three scripts:
bootstrap.shbuilds a fresh Mac. You run it once.rebuild.shapplies a change after you edit a file. You run it after each change.update.shmoves the installed programs to their newest versions. You run it when you want them.
The folder is a template, and the files are commented.
When the dialog says the software was installed, go back to Terminal and run the same command again:
git --versionIt prints a version, git version 2.50.1 (Apple Git-155) at the time of writing. git works.
Make your own copy of the repo
You can clone the template as it is: skip to the commands below and use https://github.com/agenteer/dotfiles.git as the address. If you want to keep your changes, make your own copy first, so your edits go to a repository you own. On the template’s GitHub page, click “Use this template”, then “Create a new repository”. Give it a name; the commands below use my-dotfile. Choose Public for this walkthrough, so you can clone it before we set up GitHub authentication. You can make it private after the GitHub sign-in step. Click “Create repository”.
GitHub shows your new repository. Click the green Code button and copy the HTTPS address. Back in Terminal:
git clone https://github.com/YOUR-NAME/my-dotfile.git ~/dotfiles
cd ~/dotfiles
ls
Replace YOUR-NAME with your GitHub username. git clone downloads the repository. The last part, ~/dotfiles, is where it goes: a folder called dotfiles in your home folder. cd moves into it. ls lists what is there: the same files you saw on GitHub.
A repository, or repo, is a folder whose history git keeps, so every change can be seen and undone. A clone is your own copy of one. From here on, this folder is where every change to the machine is made.
Run bootstrap to build the Mac
One caution before the command. The folder sets Mac system settings. One line in configuration.nix also tells Homebrew, the app installer the script sets up, to remove any app it installed that is not on the folder’s list. On a fresh Mac there is nothing to remove. On a Mac you already use, read configuration.nix and home.nix before you run this.
Now the command:
./bootstrap.shIt asks for your password right away. Type it. On this first run it is always typed; the reason comes with the first rebuild. Then it runs six steps and prints each one.
Step 1: Determinate Nix. Nix is the program that makes this possible. It reads the description in the files and makes the Mac match it. If the files are recipes, Nix is the cook. Nix also keeps earlier versions of what it built, so the machine can go back to one of them. Determinate is the installer that puts Nix on a Mac; it is what brings the cook to this Mac. This step is what asked for your password.
Step 2: a link. The script links the folder to a fixed place, ~/.dotfiles with a dot in front. That way the files can be found wherever you cloned them. You keep working in ~/dotfiles; the link is for the tools.
Step 3: your username. The script writes your macOS username into flake.nix, so the folder builds your account and not mine.
Step 4: the version list. flake.lock records the exact version of each piece the machine is built from. The script fills in the entries it is missing; nothing to do.
Step 5: the system. nix-darwin builds the system half of the Mac from configuration.nix: the system settings and the Mac apps. It may ask for your password again, because changing the system needs it. Part of this step installs Homebrew, the program that installs Mac apps and command-line tools. Then it installs the apps the folder lists. On this template that is one app, Ghostty, a terminal.
Step 6: your account. home-manager builds the account half from home.nix: your command-line tools, your shell (the program that reads what you type in the terminal and runs it), your editor, and the three coding agents. No password, because nothing in this half changes the system.
When it prints “Done”, the Mac has everything the two files describe. One line at the end asks you to open a new terminal window, because the window you are in does not see the new tools. The next step starts in that new window.
Now the two halves, in the files. Stay in this window for a moment and open flake.nix, on GitHub or with cat flake.nix. A flake is Nix’s word for a folder like this one, with an entry file that names what to build and where each piece comes from. Near the bottom it names both halves. darwinConfigurations is the system; nix-darwin builds it from configuration.nix. homeConfigurations is your account; home-manager builds it from home.nix. In configuration.nix, scroll to the homebrew block: the Mac apps live in the casks list, and Ghostty is the one entry. In home.nix, home.packages lists the command-line tools, the editor, GitHub’s command-line tool, and tmux, the tool that will run several agents side by side. Below them are the three coding agents:
    pkgsUnstable.claude-code   # Claude Code (the command is `claude`)
    pkgsUnstable.codex         # OpenAI Codex
    pkgsUnstable.opencode      # the open-source harness; the third reader of the one instructions file
OpenCode is an open-source coding agent that works with models from different providers. The three are pinned like the rest. flake.lock records the exact version of each, so a rebuild gives you the same versions until you ask for new ones; update.sh is what asks. The pkgsUnstable in front of their names means they come from Nix’s continuously updated package set. The rest comes from the stable release. That release takes fixes only, and a new one replaces it about every six months. Agents ship new versions every week, and that is why they are the exception.
That is Fowler’s phoenix: erased, and back from its description in under an hour. From here on, a change follows one loop: edit a line in the folder, rebuild, and the machine matches the folder.
One alternative. chezmoi copies your config files into place from a repository, with small per-machine differences filled in from a template. A Brewfile is a plain list of apps and tools for Homebrew to install. Together they give you a repository that sets up a Mac. Adding a tool is one line in the Brewfile and one brew install; there is no rebuild. What Nix gives this folder is the exact versions pinned in flake.lock and the previous build kept for rollback, and those two are why it is here.
Change it
Change a setting: terminal font size
Quit Apple’s Terminal. Press Command-Space, type Ghostty, press Return. Ghostty is the terminal the folder installed, and it is the window you work in from now on.
The first change is a small one: the terminal’s font size. The default, 15, is fine for daily use. If you sit farther from the screen, share it with someone, or want easier reading, make it larger; the steps below use 22. Ghostty has a settings window, but we are not going to open it, because clicking through settings is what this approach avoids. The font size is a line in the folder. Find it:
cd ~/dotfiles
rg ghosttyripgrep, the rg command, searches every file in the current folder for a word. It prints each matching line with the file name and line number. Two files mention Ghostty: configuration.nix, where the app is installed, and home.nix, where its settings are. One of the home.nix lines is font-size = 15;. rg prints its line number in front of it: 121 in the current folder. That is the line to change.
To edit it we need an editor. The folder installs Neovim, an editor that runs inside the terminal. Open it:
nvimThe first start takes a moment while it fetches its plugins. Then press Space. A menu of hints appears at the bottom, one for each key you can press next. Press f to find a file. A list of the folder’s files opens; type home to narrow it, move to home.nix with the arrow keys, press Return. The file opens.
Now go to the line. Type : and the line number rg printed, :121, and press Return. The cursor lands on font-size = 15;. (Typing the number alone and pressing Return moves the cursor down that many lines instead. The colon is what makes it “go to line”.)
Neovim, like Vim before it, is a modal editor. Most of the time you are in normal mode, where keys are commands, not text. To type, press i; that puts you in insert mode. Press Escape to get back to normal mode. You switch between the two constantly, so Escape is the key you press most. Now press i, use the arrow keys to put the cursor just after 15, press Delete twice, and type 22. Press Escape. Then type :wq and press Return: write the file and quit. If you ever want to leave without saving, :q! does that. The block you edited, as the folder ships it:
  programs.ghostty = {
    enable = true;
    package = null;
    settings = {
      auto-update = "off";
      font-family = "Hack Nerd Font";
      font-size = 15;
    };
  };
Yours now says 22. Ghostty can reload its settings with Command-Shift-comma. Press it. Nothing changes. Check why:
cat ~/.config/ghostty/configcat prints a file. This is the settings file Ghostty reads, and it still says font-size = 15. The folder does not write that file when you edit home.nix; it writes it when you rebuild. So:
./rebuild.shThe script applies your account half first; that needs no password. Then it applies the system half, and that asks for one. Run the cat command again: font-size = 22. Press Command-Shift-comma in Ghostty and the text is bigger. You will run this loop after each change from here on.
About that password. The folder sets these two lines in configuration.nix:
  # why: Touch ID (or Apple Watch) instead of a typed password for sudo.
  security.pam.services.sudo_local.touchIdAuth = true;
  # why: without this, Touch ID does not reach a command run inside tmux and sudo falls back to asking for the typed password.
  security.pam.services.sudo_local.reattach = true;
sudo is the word you put in front of a command to run it with the power to change the whole system. It asks you to prove you are allowed. The first line lets a fingerprint answer instead of a typed password; nix-darwin documents the option. The first bootstrap could not use it, because that run is what writes the setting. From the second build on, the password prompt in rebuild.sh takes Touch ID, with one exception. When something is recording or sharing the screen, macOS hides Touch ID from the prompt and asks for the typed password. A screen recording counts, and so does a DisplayLink dock or a screen-sharing session. Apple’s reason is a person controlling your Mac from another computer: if the prompt offered Touch ID, you might touch the sensor without thinking.
If you record or share your screen and want Touch ID back, one line turns the rule off. It goes inside the system.defaults block, the block of Mac settings near the top of configuration.nix. I added it to my own copy; it is not in the template:
    # why: while the screen is being recorded or shared, macOS hides Touch ID from the sudo dialog and asks for the
    # password instead (the same rule that bites DisplayLink docks). This tells it to offer Touch ID anyway.
    CustomUserPreferences."com.apple.security.authorization".ignoreArd = true;
The trade-off is the one Apple had in mind. If you ever let another person, or an agent, control this Mac remotely, that is the moment the rule was written for. Know the line is there, and take it out then.
Add two applications
A setting was one line. An app is one line too, and the same loop. Two apps show it, and you may want both. KeyCastr shows each key you press on screen. That is useful whenever you share or record your screen. OpenSuperWhisper is open-source dictation: hold a key, talk, and the words appear where the cursor is. It is handy when you work with agents, because prompts are faster to say than to type. If you do not want them, skip this section; the mechanism is the same for any app.
First find out how Homebrew knows the app:
brew search keycastrHomebrew lists it under Casks. Homebrew has two kinds of package. A cask is a Mac application, the kind with a window and an icon that lands in your Applications folder. A formula is a command-line program. Homebrew’s own page for KeyCastr shows it as a cask.
An app goes in configuration.nix, because apps are installed for the whole Mac. Open the editor, press Space, f, and pick configuration.nix. To find the casks list, type /casks and press Return; the cursor jumps to it. As the folder ships it:
    casks = [
      "ghostty"        # the terminal; its settings are a few lines in home.nix, not a preferences window
    ];
Move the cursor onto the "ghostty" line and press o. That opens a new line beneath it and starts insert mode. Add these two lines. They are additions. The comment starts with why because the folder’s rule is that each addition says why it is there:
      "keycastr"       # why: shows my keystrokes on screen while I record
      "opensuperwhisper"  # why: I talk to the agents more than I type to them; open-source dictation
KeyCastr needs two more lines. One makes it draw at a usable size on the current macOS. The other stops it asking whether it may update itself; nothing on this machine updates on its own. They go inside the system.defaults block near the top of the file. Press Escape, type /system.defaults and Return to jump there, then o on the line with the opening brace. This is nix-darwin’s way to set any app’s own preference by the app’s identifier. The value is the same one the app’s settings window would write. Also additions:
    CustomUserPreferences."io.github.keycastr".selectedVisualizer = "Svelte";   # why: KeyCastr's default overlay clips every key on this macOS; Svelte draws at a usable size
    CustomUserPreferences."io.github.keycastr".SUEnableAutomaticChecks = false;   # why: nothing on this Mac updates on its own; update.sh moves it
Escape, :wq, Return. Then rebuild:
./rebuild.shThe system half prints that it is installing keycastr and opensuperwhisper. When it finishes, press Command-Space, type KeyCastr, Return. macOS asks for Input Monitoring permission, because an app that shows your keys has to see them. Open System Settings from the dialog, turn KeyCastr on, then quit KeyCastr and open it again. Back in Ghostty, type date and your keys appear on screen as you press them.
Before you go on: quit KeyCastr, or stop it casting, before you type any password. A terminal prompt does not always hide what you type from a keystroke overlay.
Now OpenSuperWhisper. Command-Space, OpenSuperWhisper, Return. Accept the defaults. It asks you to download a speech model; pick one and wait. Then it asks for Microphone and Accessibility permissions; grant both. Hold the right Option key and say a sentence; the words appear in the terminal. If nothing appears, press Command-Q to quit it, open it again, and try once more. The model takes time to load after the permissions are granted, and a restart is what the app needs.
Two apps, two lines each, one rebuild. No download page, no dragging to Applications, and both apps are now in the folder with a reason next to them.
If you want to try an app first, you do not need the loop. brew install <name> installs it. The next rebuild removes it unless you have added its line by then; that is the cleanup rule from the caution before bootstrap.
Work with the agents
Start Claude Code
Bootstrap installed the three agents. See where they are:
which claude codex opencodewhich prints where a command lives. All three are under ~/.nix-profile/bin, the folder where home-manager puts your tools. Before an agent works it needs an account. Claude Code needs a Claude account, Codex needs an OpenAI account, and OpenCode asks which provider you use. Sign in to the one you have; the others can wait. Run the agent once and it walks you through the sign-in. The folder holds no keys or tokens, so that step is yours to do.
Start Claude Code:
claudeIf you ever demo or record Claude Code, start it as IS_DEMO=1 claude instead: the variable tells it not to print your account’s email on screen. Otherwise you do not need it.
Two things to notice on the first screen. Claude Code runs in auto mode: for routine actions, like reading a file or running a safe command, it decides for itself and does not stop to ask. You are asked about the rest. The status line at the bottom names the model; the one used here is Opus, Anthropic’s larger model. /effort sets how hard it thinks before answering; low is enough for the questions here, and for real work leave it where it is.
Now the first prompt. Type it, or say it with OpenSuperWhisper if you installed it; a few transcription errors in a prompt do not bother the agent:
Check the nix files under this folder and tell me what they do and why we are using them. Give me a three-sentence brief.
The answer should say, in some form, that this is a declarative macOS setup: configuration.nix owns the system half, home.nix owns the user half, the scripts rebuild and update it, and whats-not-declared.sh reports anything that crept in outside Nix. That last script is the fourth one in the folder. Claude Code may offer to run it, as ghost text at the prompt; press Tab to accept and Return. If it does not offer, run ./whats-not-declared.sh yourself. It lists what is on the Mac that the folder does not account for: Homebrew apps not on the list, lines in your shell file, programs an installer dropped into ~/.local/bin. The shell file is ~/.zshrc, the startup file that installers like to append a line to. The folder keeps its own shell setup in ~/.config/zsh. That leaves ~/.zshrc an ordinary file any installer can write to, and the managed setup reads it last. The script prints whatever is in it. Right now it prints nothing, because nothing has drifted yet. This is the check to run whenever you wonder what an agent, or you, left behind.
One more thing on this screen. The input box stays at the bottom while the answer streams above it, and you can scroll the answer without losing the box. Claude Code’s documentation calls this fullscreen rendering; it is the default for new accounts.
Get a session back after closing
What happens if the window closes? Press Command-W and confirm. The window closes, and Claude Code with it. Open a new Ghostty window, go to the folder, start Claude Code:
cd ~/dotfiles
claude
It is a new session; the conversation you just had is not on screen. It is not gone either. Quit with /exit, then:
claude --resumeClaude Code lists your earlier sessions with the time and the first prompt. Pick the one you just left and the whole conversation comes back. Claude Code’s command reference lists --resume and --continue. The second reopens the most recent session without showing the list.
That is Claude Code’s own way back. The general one works for any program, agents included.
Run agent teams inside tmux
tmux is a terminal multiplexer. It runs your terminal sessions and keeps them running when the window closes. Programs inside it keep going after you quit the terminal, an agent included, and you come back to them. It also splits one window into panes, so several agents run side by side. The folder installs it and sets it up in home.nix:
  programs.tmux = {
    enable = true;
    keyMode = "vi";           # h/j/k/l in copy mode, like the editor
    mouse = true;             # click a pane to focus it; scroll agent output
    escapeTime = 0;           # Esc reaches Neovim at once instead of after a pause
    extraConfig = ''
      set -g default-terminal "tmux-256color"
      set -ag terminal-overrides ",xterm-256color:RGB"   # true color for the theme
      # why: inside tmux, Shift-Enter otherwise submits an agent prompt instead of adding a line, and a finished
      # agent cannot notify the outer window; Claude Code documents these three lines for tmux.
      set -g allow-passthrough on
      set -s extended-keys on
      set -as terminal-features "xterm*:extkeys"
    '';
  };
The comment in the block says what the last three lines do; they come from Claude Code’s terminal setup page.
Start it, and start Claude Code inside it:
tmux
claude
Every tmux command starts with a prefix, Control-B, then a key. Press Control-B, then %. The window splits into two panes side by side, and the new one is a fresh shell. In it, open Claude Code’s settings file:
nvim home/.claude/settings.jsonThis is the file the folder ships for Claude Code. It lives in the folder and is linked into the place Claude Code reads it from, so an edit here takes effect without a rebuild. As shipped:
{
  "theme": "dark-ansi",
  "env": {
    "DISABLE_AUTOUPDATER": "1"
  },
  "statusLine": {
    "type": "command",
    "command": "input=$(cat); model=$(echo \"$input\" | jq -r '.model.display_name'); used=$(echo \"$input\" | jq -r '.context_window.used_percentage // empty'); if [ -n \"$used\" ]; then printf \"%s | ctx: %.0f%% used\" \"$model\" \"$used\"; else printf \"%s\" \"$model\"; fi"
  }
}
The env block sets variables for every Claude Code session. The one there stops Claude Code updating itself, because update.sh does that. We add two settings. Agent teams are an experimental Claude Code feature, documented on its agent teams page. One variable turns it on, and a setting called teammateMode tells Claude Code where to put the teammates. Set it to tmux and each teammate gets its own pane. Press i and edit until the file reads like this. Two lines are new, the CLAUDE_CODE_EXPERIMENTAL_AGENT_TEAMS variable and teammateMode, and they are additions:
{
  "theme": "dark-ansi",
  "env": {
    "DISABLE_AUTOUPDATER": "1",
    "CLAUDE_CODE_EXPERIMENTAL_AGENT_TEAMS": "1"
  },
  "teammateMode": "tmux",
  "statusLine": {
    "type": "command",
    "command": "input=$(cat); model=$(echo \"$input\" | jq -r '.model.display_name'); used=$(echo \"$input\" | jq -r '.context_window.used_percentage // empty'); if [ -n \"$used\" ]; then printf \"%s | ctx: %.0f%% used\" \"$model\" \"$used\"; else printf \"%s\" \"$model\"; fi"
  }
}
Mind the commas: every line inside a block ends with one except the last. If you use the demo flag from the first Claude Code start, "IS_DEMO": "1" in the same env block saves typing it each time. Escape, :wq, Return.
Click back into Claude Code’s pane. This is the main agent, the one you talk to. First, subagents. A subagent is a separate agent session that the main agent starts for one task. It runs in the background: you do not see it work, and you cannot talk to it. It reads what it needs, returns its result to the main agent, and ends. The main agent then uses the results to answer you. Claude Code documents them on its subagents page. Ask:
Please look at the three nix files under this folder and give me a one-sentence brief for each. Please use three subagents to inspect them individually.
The main agent starts three subagents, one per file. Each reads its file and reports back, and then it is gone. What you see is the main agent’s answer: three one-sentence briefs.
Now teammates. Claude Code reads its settings when it starts, so quit it with /exit and start claude again. Then ask:
Please spin up three individual teammate agents to investigate each of the nix files under this folder and give me a one-sentence summary for each.
This time three new panes open in the tmux window, one per teammate. Each is a live Claude Code session working on its file. A teammate also works for the main agent, and the main agent coordinates them. The difference from a subagent is that a teammate runs in its own pane, where you can watch it work, click into it, and talk to it directly.
Now the reason tmux is here. With the team running, press Command-Q and confirm. Ghostty is gone. Open it again and type:
tmux attachEverything comes back: the split, the main agent, the three teammates, still running. They were never running in the window. They were running in tmux, and the window was only showing them. Close the laptop, drop a remote connection, quit the terminal by mistake: tmux attach brings it back.
Let an agent change it
Ask the agent: Caps Lock as Escape
So far you have made the changes yourself. This one is a change you do not know how to make, handed to the agent, then checked. Neovim’s two modes came up with the font size: every return from insert mode to normal mode is an Escape, so it is the key you press most. Escape is far from the home row. Caps Lock sits under your little finger and you rarely need it. Remapping it is a system setting; where that lives in this setup is a question for the agent.
Press Control-B, then c. tmux opens a new window, a clean screen next to the one with the team. Start claude and ask:
I’m using Vim in this system and I want to use my Caps Lock key as the Escape key so it’s easier to type the Vim keystrokes. How do I do that with our nix configuration?
The agent reads the folder and edits configuration.nix. It adds two lines. It should also say why it put them there and not in home.nix: a key remap is a system-level setting, and that is the right place. These are additions, the agent’s, with the comment I would have written:
  # why: Caps Lock acts as Escape, which Neovim uses constantly and the keyboard puts far away.
  system.keyboard.enableKeyMapping = true;
  system.keyboard.remapCapsLockToEscape = true;
Then it tells you to rebuild. Before that, tidy up. Press Control-B, then n to go back to the first window, and ask the main agent:
Can you close all your teammates, since they are no longer in use.
It sends the signal and the three panes close. You now have two windows: window 1 with the team’s agent and the pane you edited settings in, window 2 with the second agent. Control-B, n moves between them. Now the rebuild. You run it yourself, in a pane of your own. Control-B, % opens one next to the agent, then:
./rebuild.shIt asks for the password, or Touch ID, as before. When it finishes, test the change:
nvimPress i, type hello world, and press Caps Lock. The -- INSERT -- marker at the bottom disappears. Caps Lock now does what Escape does: it leaves insert mode. Type :q! and Return to leave without saving.
You still check: read the lines it wrote, rebuild yourself, and press the key. The section “Read the change before you accept it” shows what an unread change costs.
Update the agents
Coding agents ship new versions several times a week. Nothing in the folder updates on its own, so a month-old agent stays a month old until you ask. Do it now, before the commit, so the versions you are on are saved with the rest. Check the versions:
claude --version; codex --version; opencode --versionAt the time of writing: Claude Code 2.1.245, Codex 0.149.0, OpenCode 1.18.21. Then:
./update.shThe script moves every pinned version in flake.lock to today’s and rebuilds your account. Then it asks Homebrew to upgrade its apps. It prints one line per program that changed, old version to new. No password is needed: Homebrew upgrades its own apps without one, and the system half is not rebuilt. It takes about a minute. Run the three version commands again. At the time of writing, one run moved Claude Code from 2.1.245 to 2.1.258, Codex from 0.149.0 to 0.151.0, and OpenCode from 1.18.21 to 1.18.25, and the GitHub tool moved with them.
The move is recorded in flake.lock, and git sees that as a change. The commit that follows saves it with the rest: a readable list of what moved, and a file that says which versions you are on.
Keep every change
Commit your changes with lazygit
What you changed since bootstrap, and what the agent changed, is sitting in the folder. Before saving, check the other direction once more:
./whats-not-declared.shStill nothing. Everything on the Mac came through the folder. Now save the changes to your repository with lazygit, a git tool that shows the repository’s state on one screen:
lazygitPress Return past the welcome screen. The top-left panel lists every changed file. Move through them with the arrow keys and the right panel shows each change:
configuration.nix: KeyCastr, OpenSuperWhisper, the two preference lines, the Caps Lock remap.flake.lock: the versions that moved in the update.flake.nix: your username, written by bootstrap.home/.claude/settings.json: agent teams and teammate mode, the effort level if you changed it (/effortwrites it here), and the demo flag if you set it.home.nix: the font size.
Every change you made since the template, and every change an agent made, is in this list to read.
Press a to stage all the files, then c to commit. Type a message, my machine day one, and Return. It fails: no email was given, and auto-detection is disabled. The folder does that on purpose. In home.nix:
  programs.git.enable = true;
  # why: without this, git guesses an author from your account name and the Mac's hostname and commits with that. This makes it refuse until name and email are set.
  programs.git.settings.user.useConfigOnly = true;
Git’s useConfigOnly setting stops git inventing an author from your account name and the Mac’s name. Your name and email are not in a public template, so the first commit refuses until you add them. Quit lazygit with q and ask the agent, in either window:
I’m trying to commit to my repository and it doesn’t let me because I haven’t specified my name and email. Can you help me do that? Here is my name and email: YOUR NAME, YOU@EXAMPLE.COM
The agent finds the git block in home.nix and adds the identity there, rather than running git config. That is the right call. git config would set it on this Mac only, outside the folder, and the next machine built from the folder would not have it. The lines it adds, an addition:
  programs.git.settings.user = {
    name = "YOUR NAME";
    email = "YOU@EXAMPLE.COM";
  };
Rebuild, since home.nix changed:
./rebuild.shCheck that git sees it:
git config user.emailIt prints the address you gave. Then lazygit again, a, c, the message, Return. The commit lands. A commit is a saved point in the repository’s history, with a message. This is your first: the machine on day one, with the changes since the template.
Sign in to GitHub and push
The commit is on your Mac. Pushing sends it to your repository on GitHub, so the folder exists somewhere other than this machine. Ask the agent:
Can you check the remote of our repo. Are we ready to push? I’ve already committed.
It reports two things. origin, the remote, is the repository you created at the start. main, the line of history you are on, tracks it. Then:
Can you push it for us?
It fails: the Mac has not proven to GitHub who you are. Sign in with GitHub’s command-line tool, gh; the folder installed it. It will ask you to choose between SSH and HTTPS, so decide that first.
SSH or HTTPS. This is about how git proves who you are to GitHub. With SSH, the proof is a key pair on the Mac; gh makes the key and uploads its public half to your account. With HTTPS, the proof is a token that gh stores and hands to git when needed. GitHub’s page on remote addresses describes both. gh sets up either, and neither needs renewing in normal use. The real differences are two. A key also works with any other git server, with no gh involved. The token route is less setup than the key, because gh does the setup. I prefer SSH, and the steps below follow that choice. If you are unsure, pick HTTPS. It needs no key, and your push will go through without the fix that follows. Read “Read the change before you accept it” anyway; its lesson is not about SSH.
gh auth loginIt asks a few questions. Where: GitHub.com. Protocol for git operations: SSH or HTTPS. With SSH, generate a new SSH key: yes. It then asks for a passphrase for the key; quit KeyCastr before you type one, or press Return for none. Give the key a title, my mac. How to authenticate: with a web browser. It prints a one-time code; press Return, paste the code in the browser, authorize.
Back in Claude Code:
Try the push again.
With HTTPS, it goes through. With SSH, it fails once more, and the agent sees why. You cloned over HTTPS, so the repository’s remote address starts with https://, but the sign-in you just did is SSH. gh auth login sets up a key; it does not change the address of a repository you already cloned. So git tried the HTTPS address, wanted a token that was never set up, and failed. The agent proposes a fix. What it proposes varies from one run to the next; in my run it was an edit to home.nix that makes git use SSH for GitHub, and that is the fix the rest of this section follows. You will be tempted to simply accept it. It makes sense, it fixes the error, and the details look like something you can skip. Accept it; what you skipped comes next. Then ./rebuild.sh, since home.nix changed. Then lazygit, a, c, a message, and ask the agent to push. This time it goes through. Open your repository on GitHub. There are three commits: the template’s, day one, and the fix. The folder that built this machine is now in two places.
Read the change before you accept it
Now read the fix. The one my agent proposed was one line in home.nix.
programs.git.settings.url."git@github.com:".insteadOf = "https://github.com/";My original intention was to push this one repository over SSH. This line makes every repository under my account use SSH. Git’s url.insteadOf rewrites every address that starts with https://github.com/ to the SSH form before git uses it. home-manager writes it into your user-wide git settings, so it applies to every repository under your account, not only this one. That is a valid setting; plenty of people set it once so all their GitHub traffic goes over SSH. The problem is the scope: the ask was one repository, and the change covered all of them.
It also sets a trap for this folder in particular. Think about the next fresh Mac. The first clone is over HTTPS, before any key exists. Then bootstrap builds the account, and from that moment this line rewrites every GitHub address to SSH. The next fetch from GitHub through git needs a key that is not there yet. The editor’s first start is one such fetch: Neovim fetches its plugins from GitHub. Between the first rebuild and the GitHub sign-in, that fails. The one-repository change cannot do that.
So tell the agent (if you signed in over HTTPS, there is nothing to revert; read on to see the one-repository form):
I just realized your change of rewriting HTTPS to git is affecting every repository on my account. That’s not what I wanted. I just wanted you to push this particular repo over SSH. Revert your change, and simply set the remote of this repo to SSH instead of HTTPS.
It acknowledges that the rewrite was global, removes the line from home.nix, and runs the one-repository fix instead:
git remote set-url origin git@github.com:YOUR-NAME/my-dotfile.gitgit remote set-url changes the address one repository pushes to and pulls from. It lives in this repository’s own settings and touches nothing else on the Mac. Rebuild, since home.nix changed, and check both results. In lazygit, the change to home.nix is the removal of the line. Then:
git remote -vThe remote’s address now starts with git@github.com:. The key gh made is what it uses. Commit in lazygit as before, ask the agent to push, and the repository on GitHub carries the correction too.
Agents accelerate the work, and they also over-engineer, most often on the topics you know least. People skip the reading in two ways. You know the area and want to move fast, so you wave the change through. Or you do not know the area and cannot judge it, so you take the agent’s word. Both need the read. The Caps Lock change was read before the rebuild. The push fix was not. Learning where that reading is needed is part of practicing agentic engineering.
Go back to the last build that worked
Sooner or later a rebuild leaves the machine worse than it was before it, and this is the way back. When an agent breaks the machine, or you do, the previous build is still there: every rebuild keeps the one before it. The machine has two halves, so there is one command per half:
home-manager switch --rollback     # your account
sudo darwin-rebuild --rollback     # the system
The account rollback puts back the previous build of your tools, your shell, and the agents. It leaves the Homebrew apps and the files under home/ alone. The system rollback puts back the previous system settings and the list of Mac apps you had, each at today’s version. You usually need only the one whose half broke. home-manager documents its rollback, and nix-darwin’s darwin-rebuild takes the same --rollback switch.
A rollback undoes a build, not an edit. If the folder itself is wrong, undo the edit with git and rebuild:
git checkout -- home.nix
./rebuild.sh
Each commit is a state the folder can go back to.